Creating Your First Page
In this tutorial, we'll create a page and build components using workflows, then deploy them.
Creating a Page
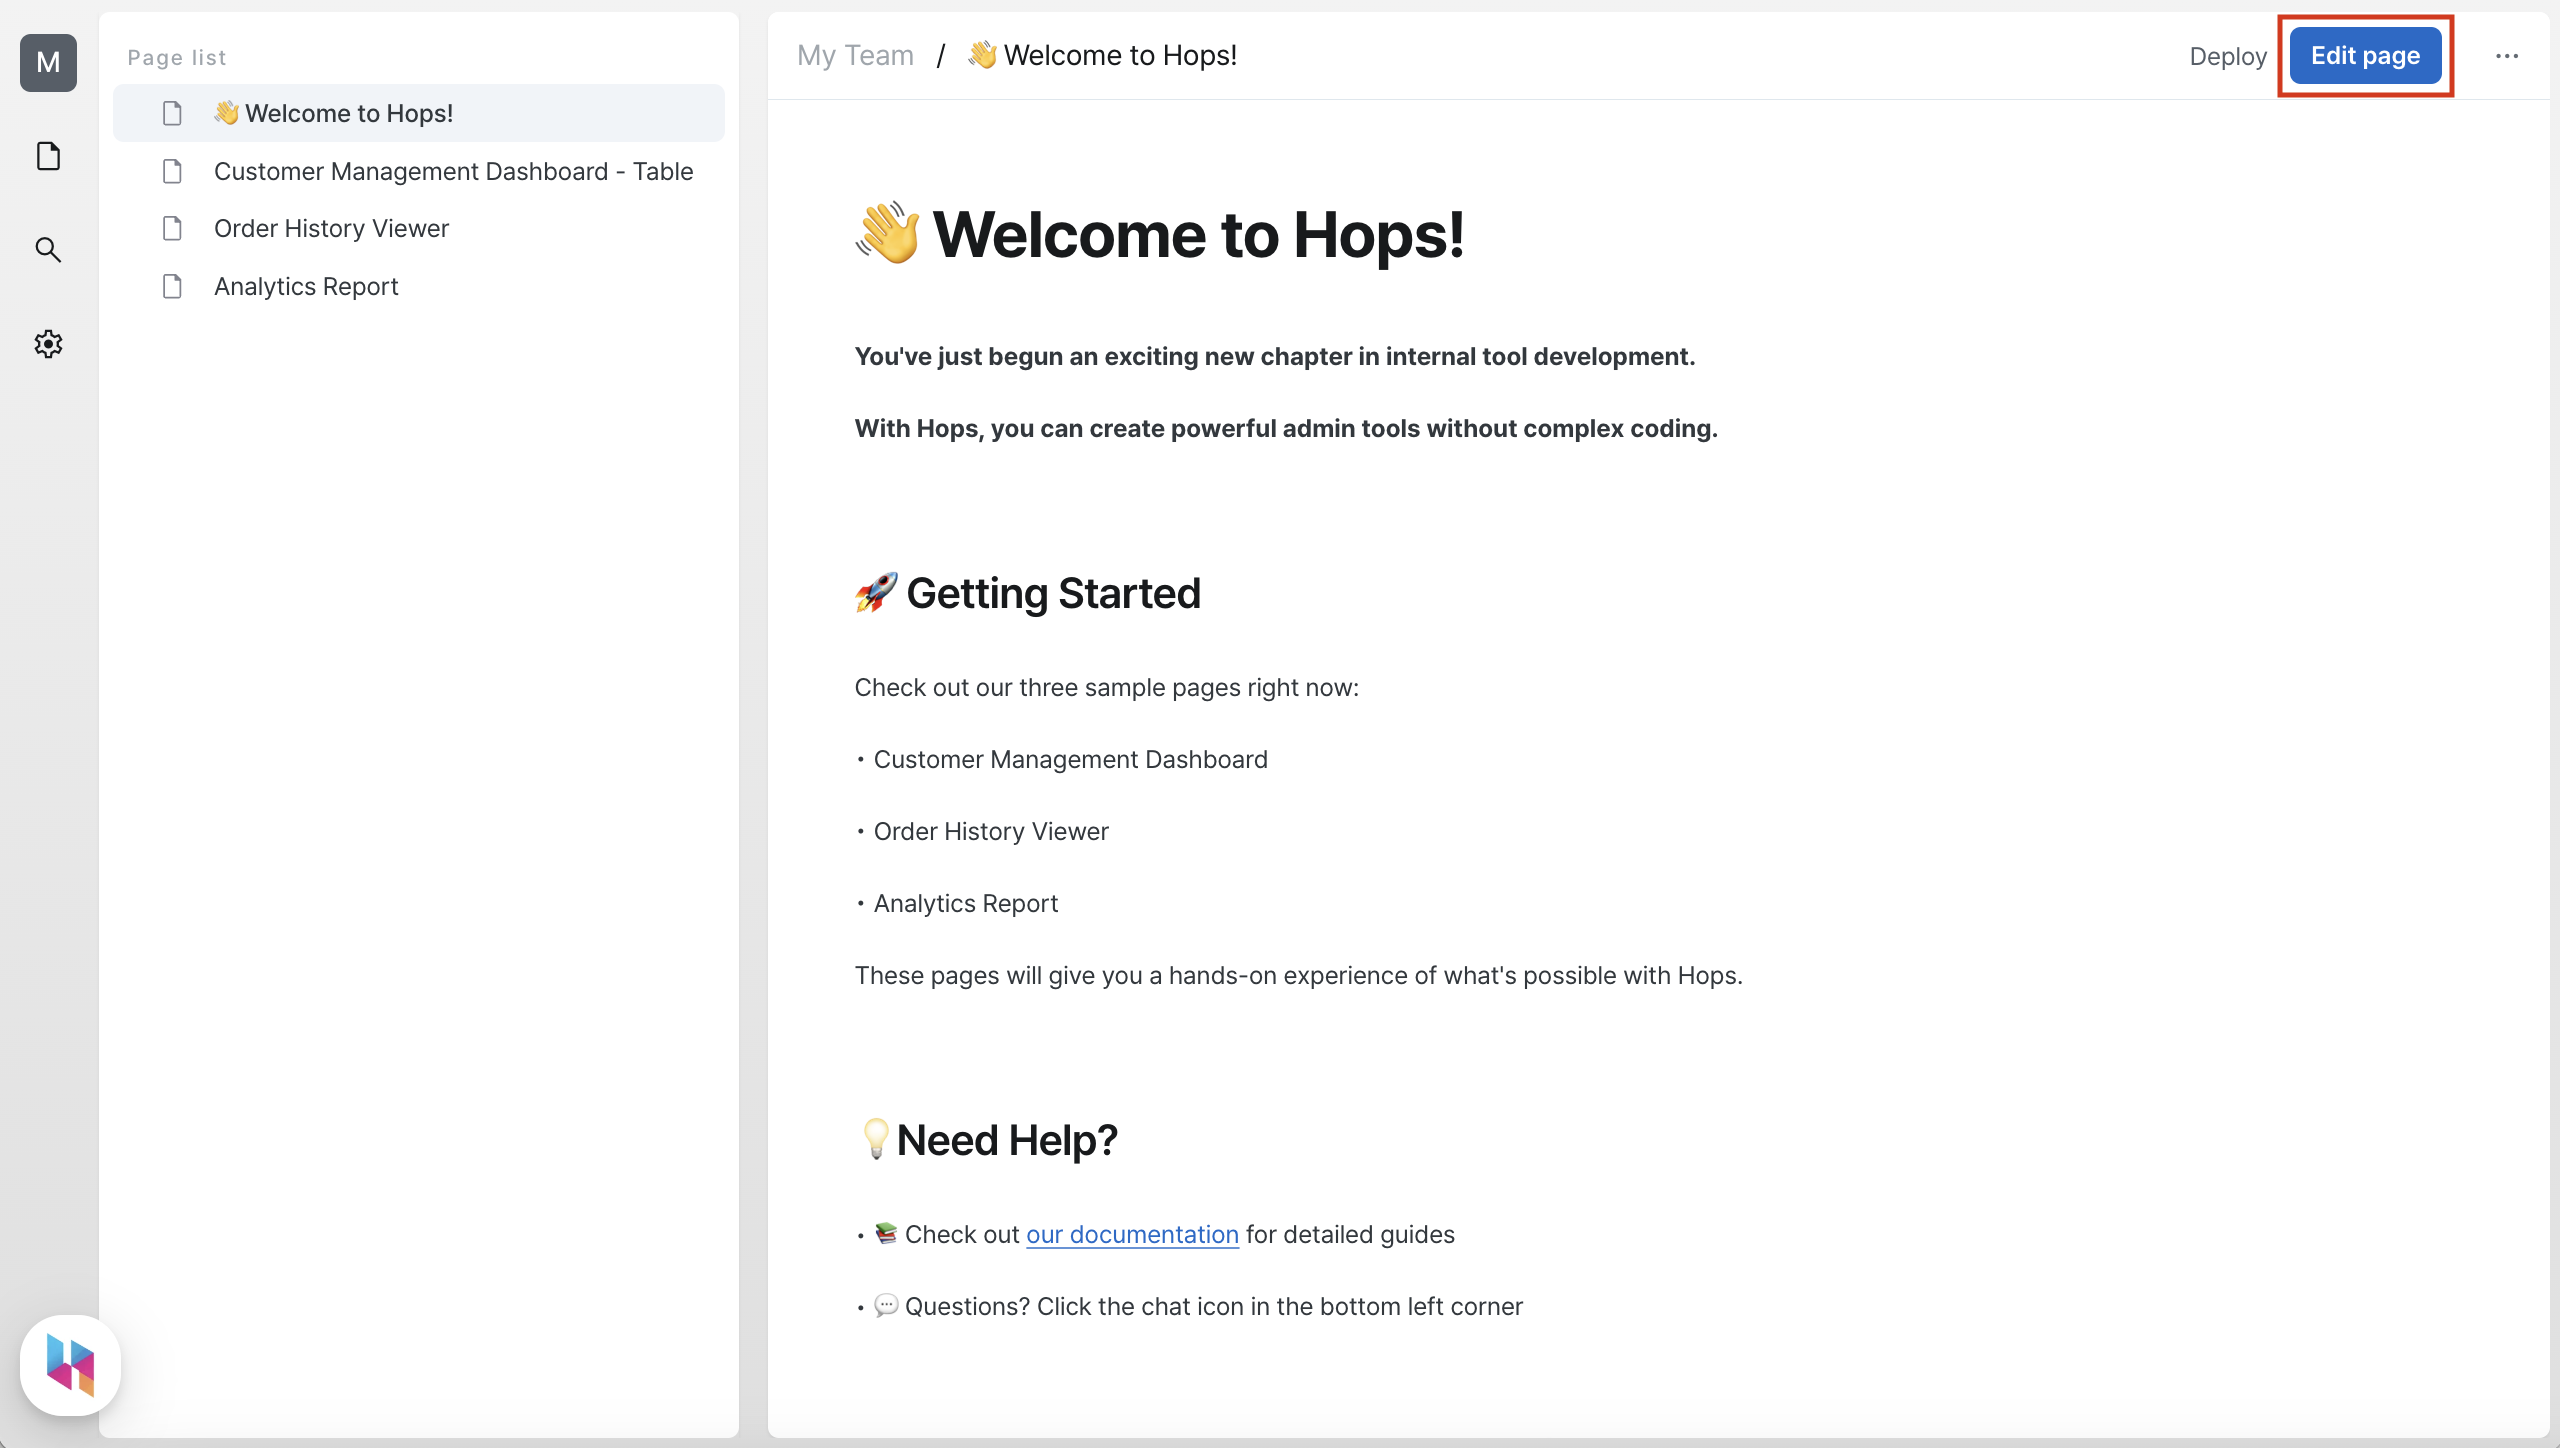
First, you'll need to add a page to create your desired admin/backoffice interface. If you've just logged in, you're probably looking at a deployed page that can't be edited. You can add a new page using the "Edit Page" button in the top right.
You can add pages from the sidebar. When you add a new page, you'll see an empty page.
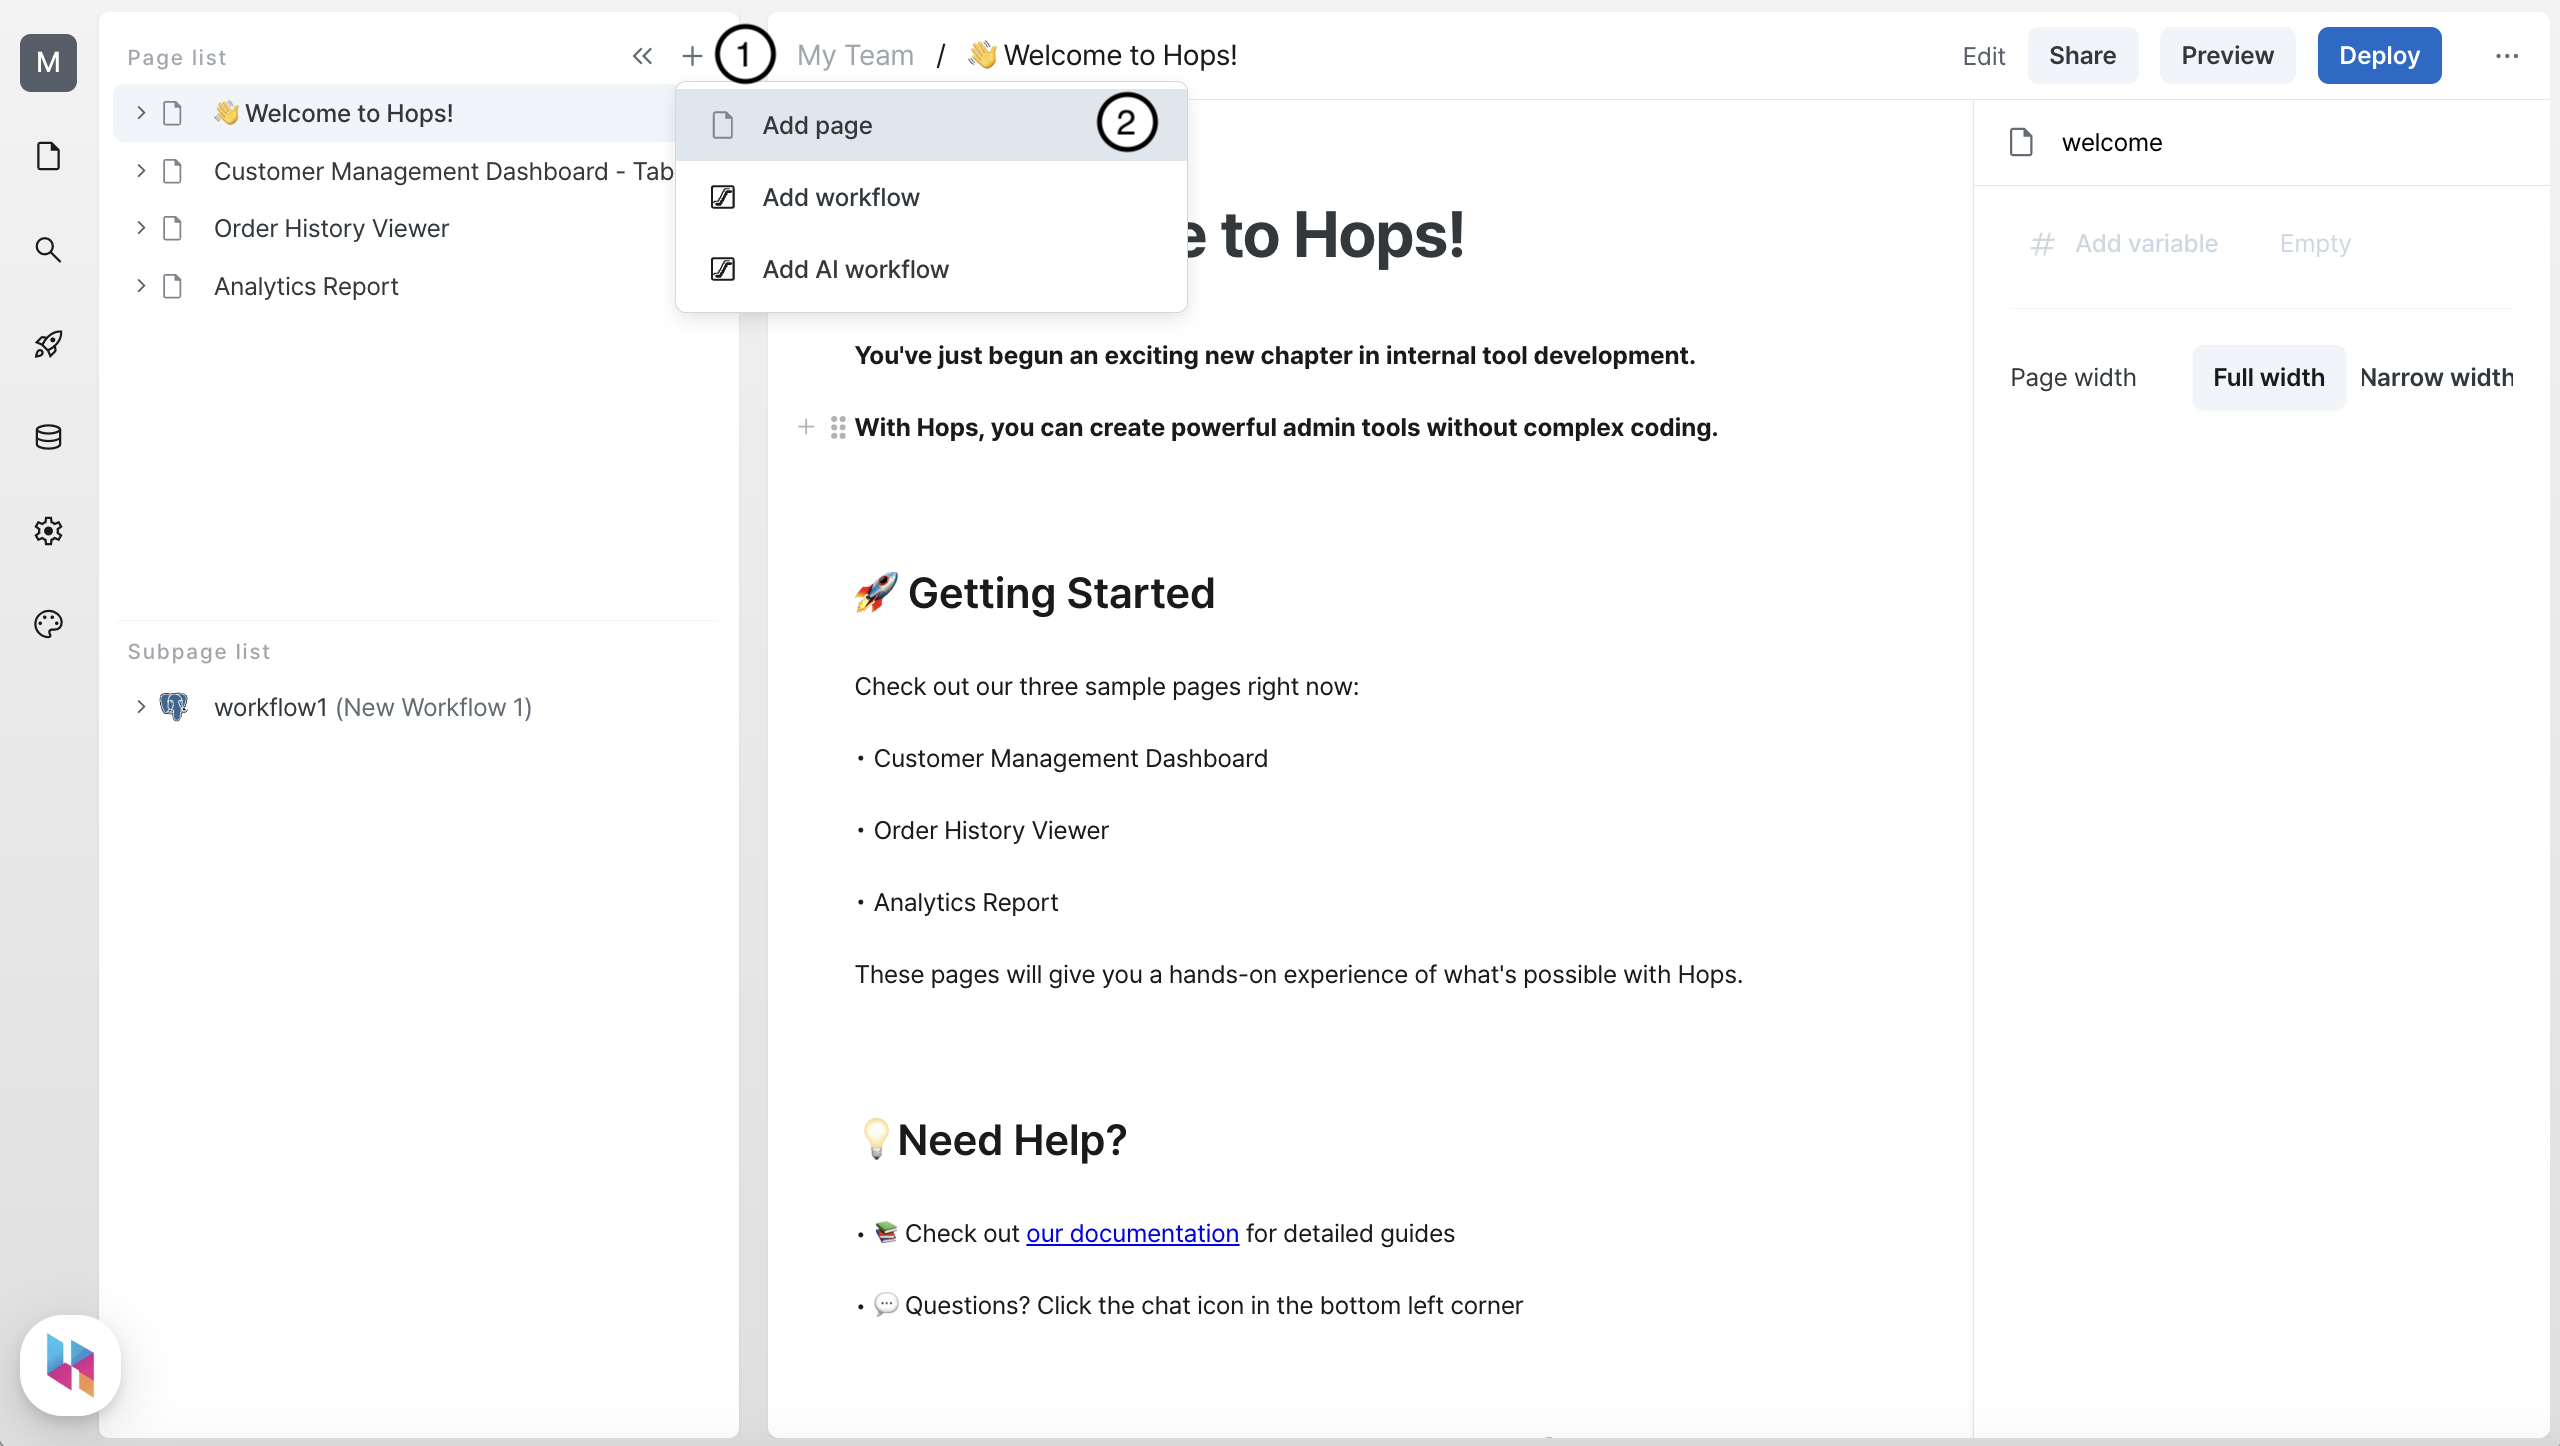
Creating a Workflow
Now that we've created a new page, let's try using a workflow. Workflows can fetch external data by connecting to data sources or implement business logic using JavaScript code.
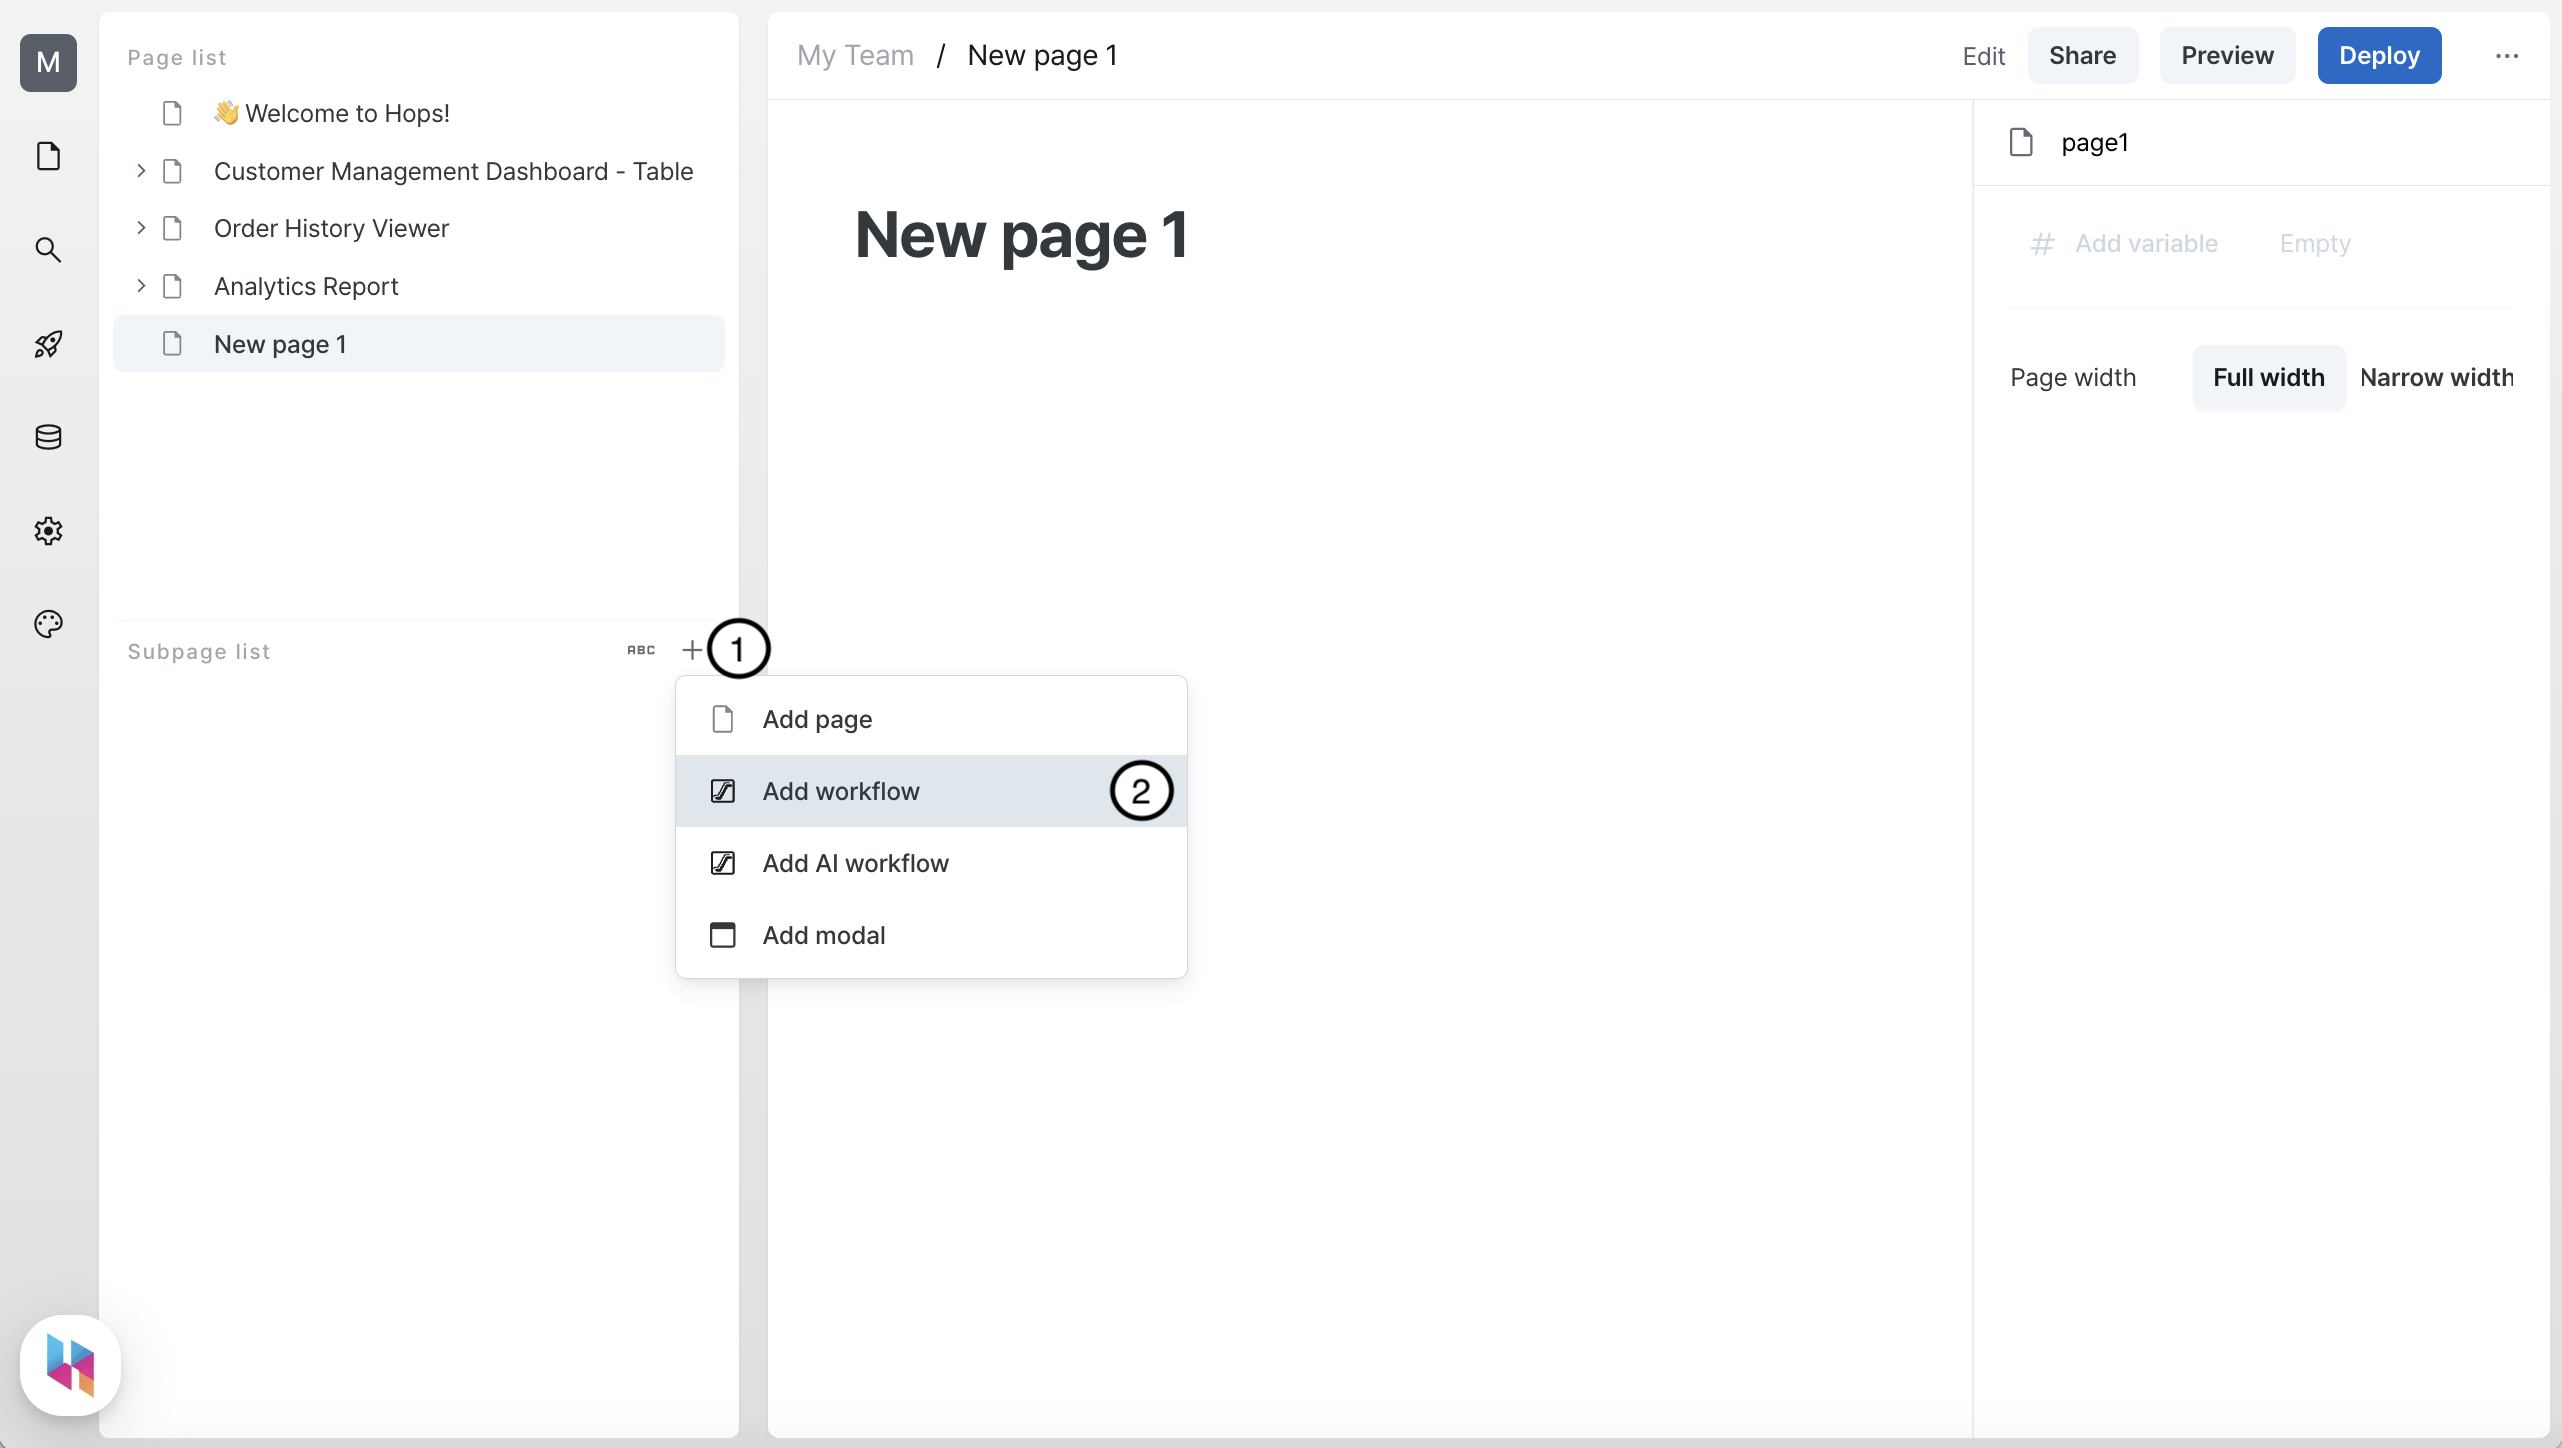
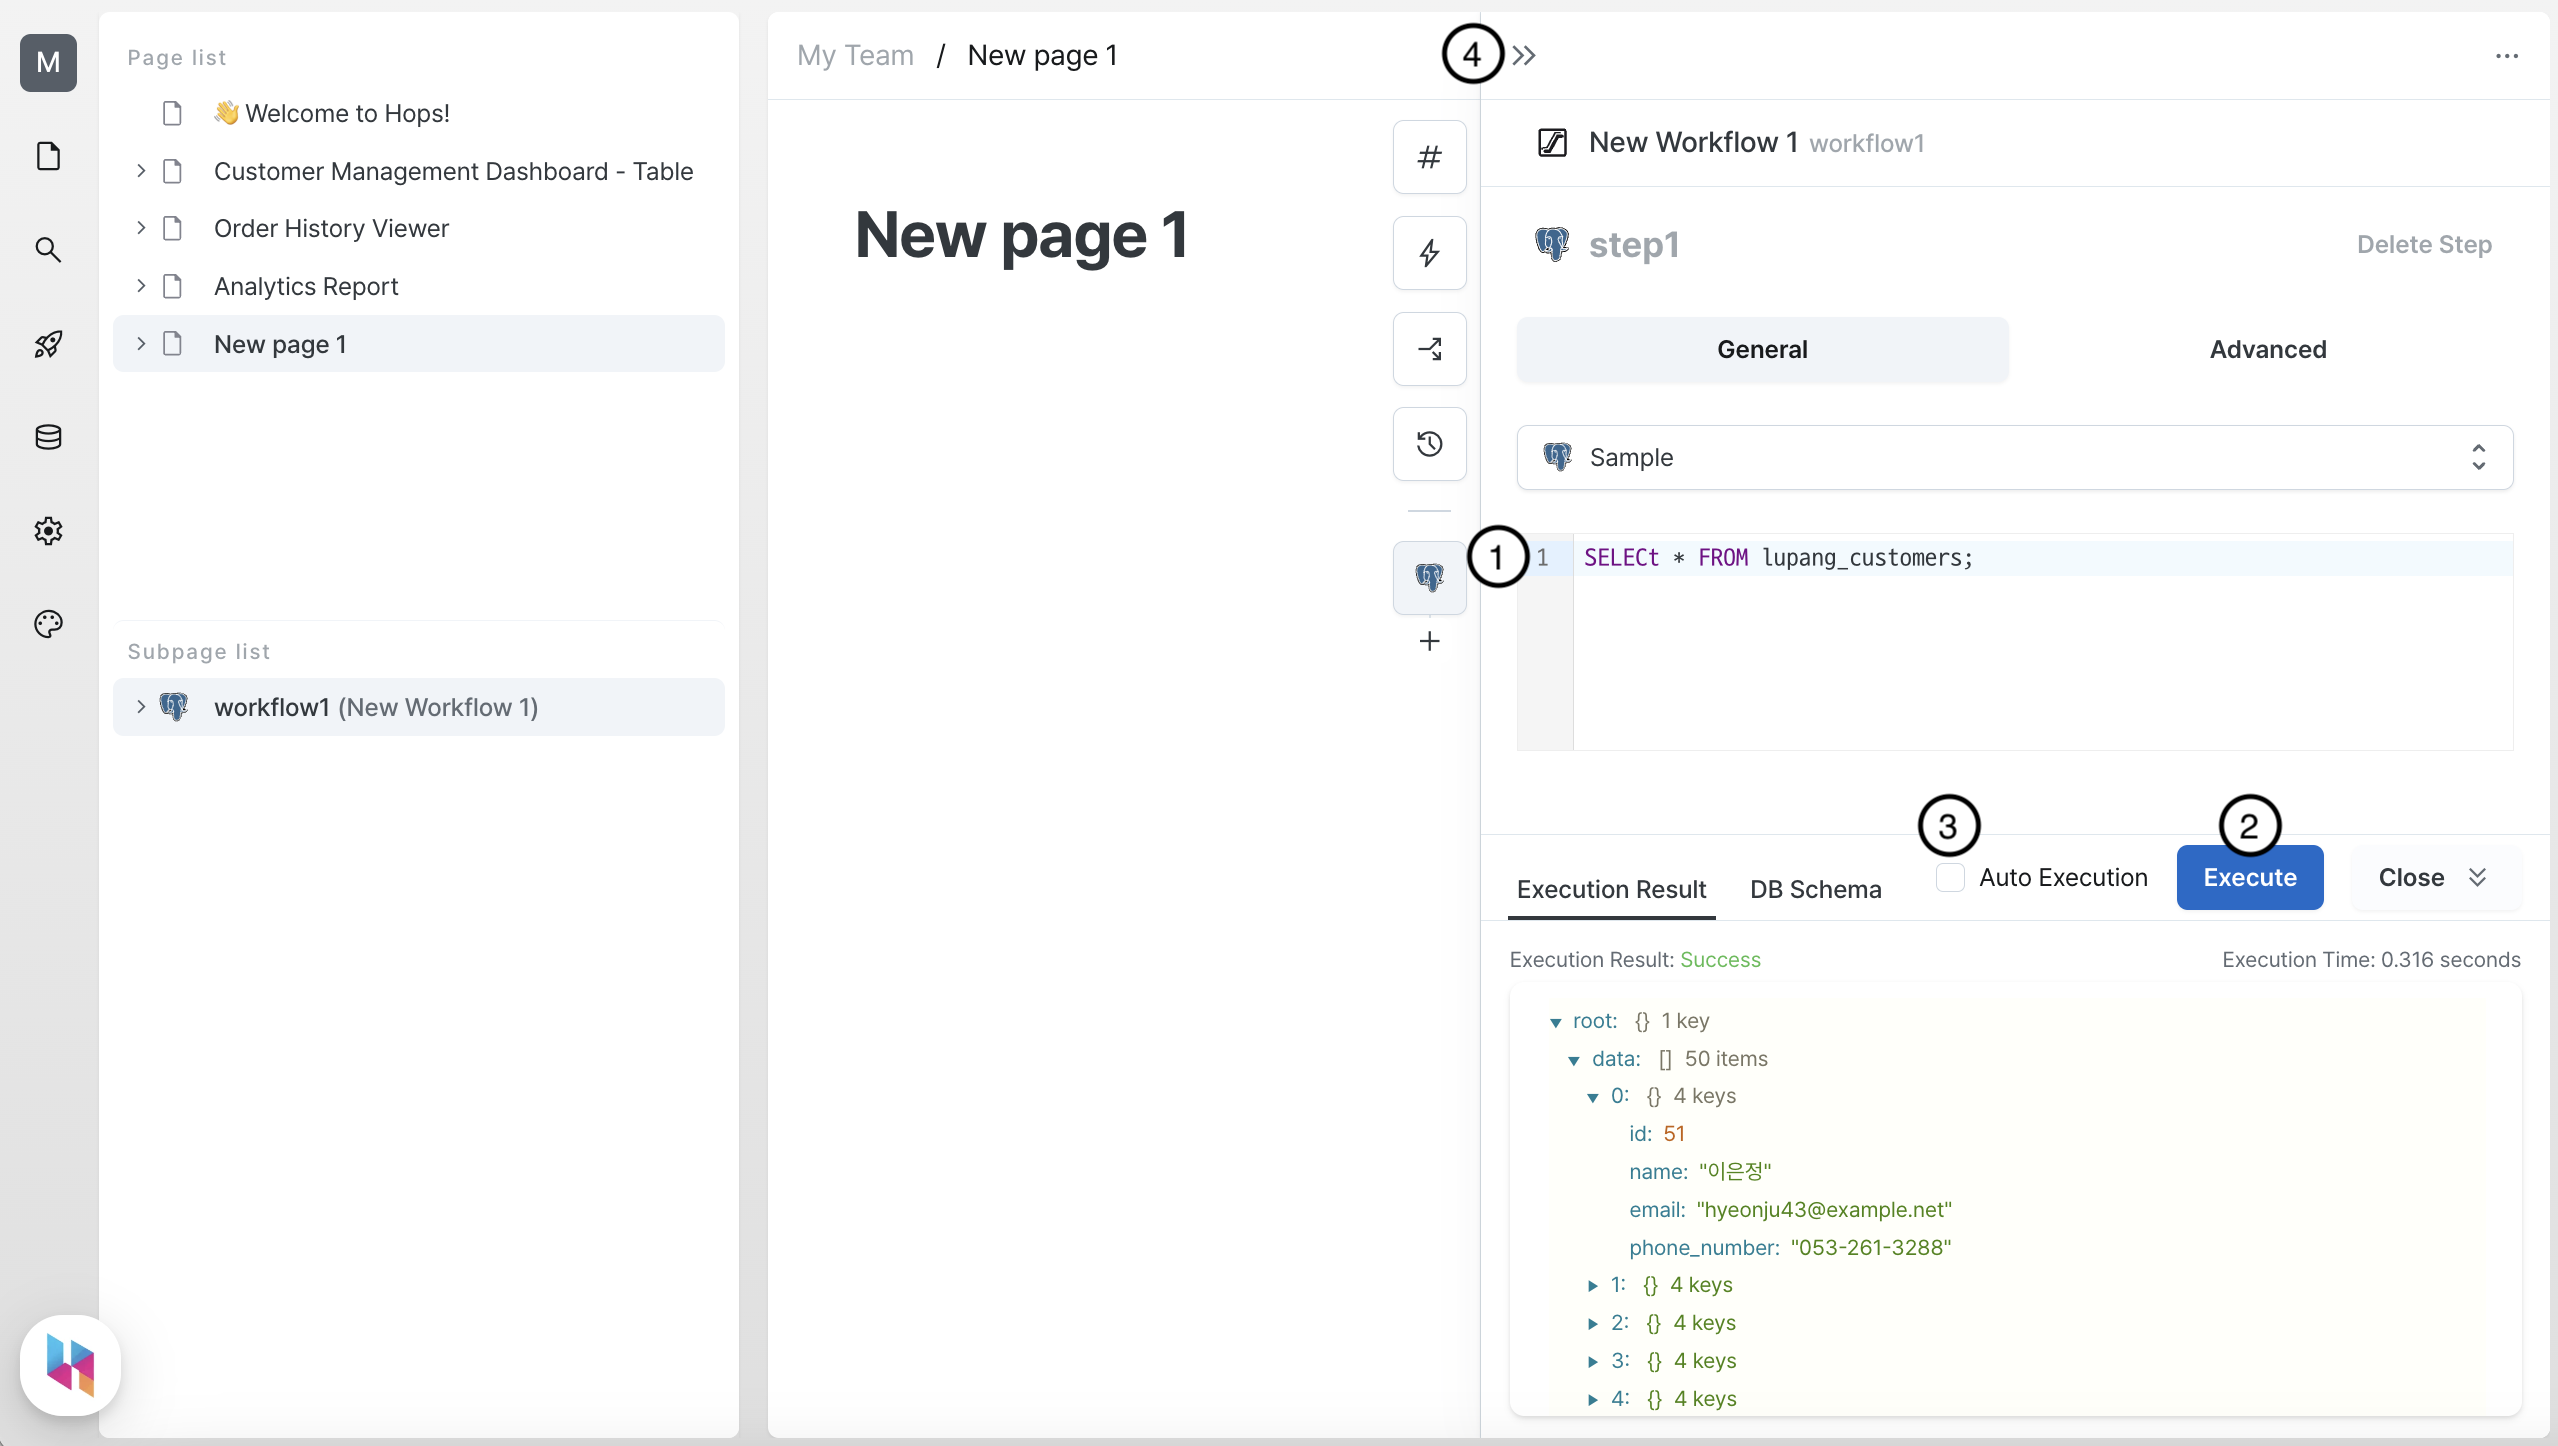
Click the "Add Workflow" button and enter a workflow name. Click "Create Empty Workflow" to create the workflow.
A separate window will open on the right where you can write simple code. Select the external service you want to get data from in the data source list. For this tutorial, we'll fetch data directly from a prepared PostgreSQL database server.
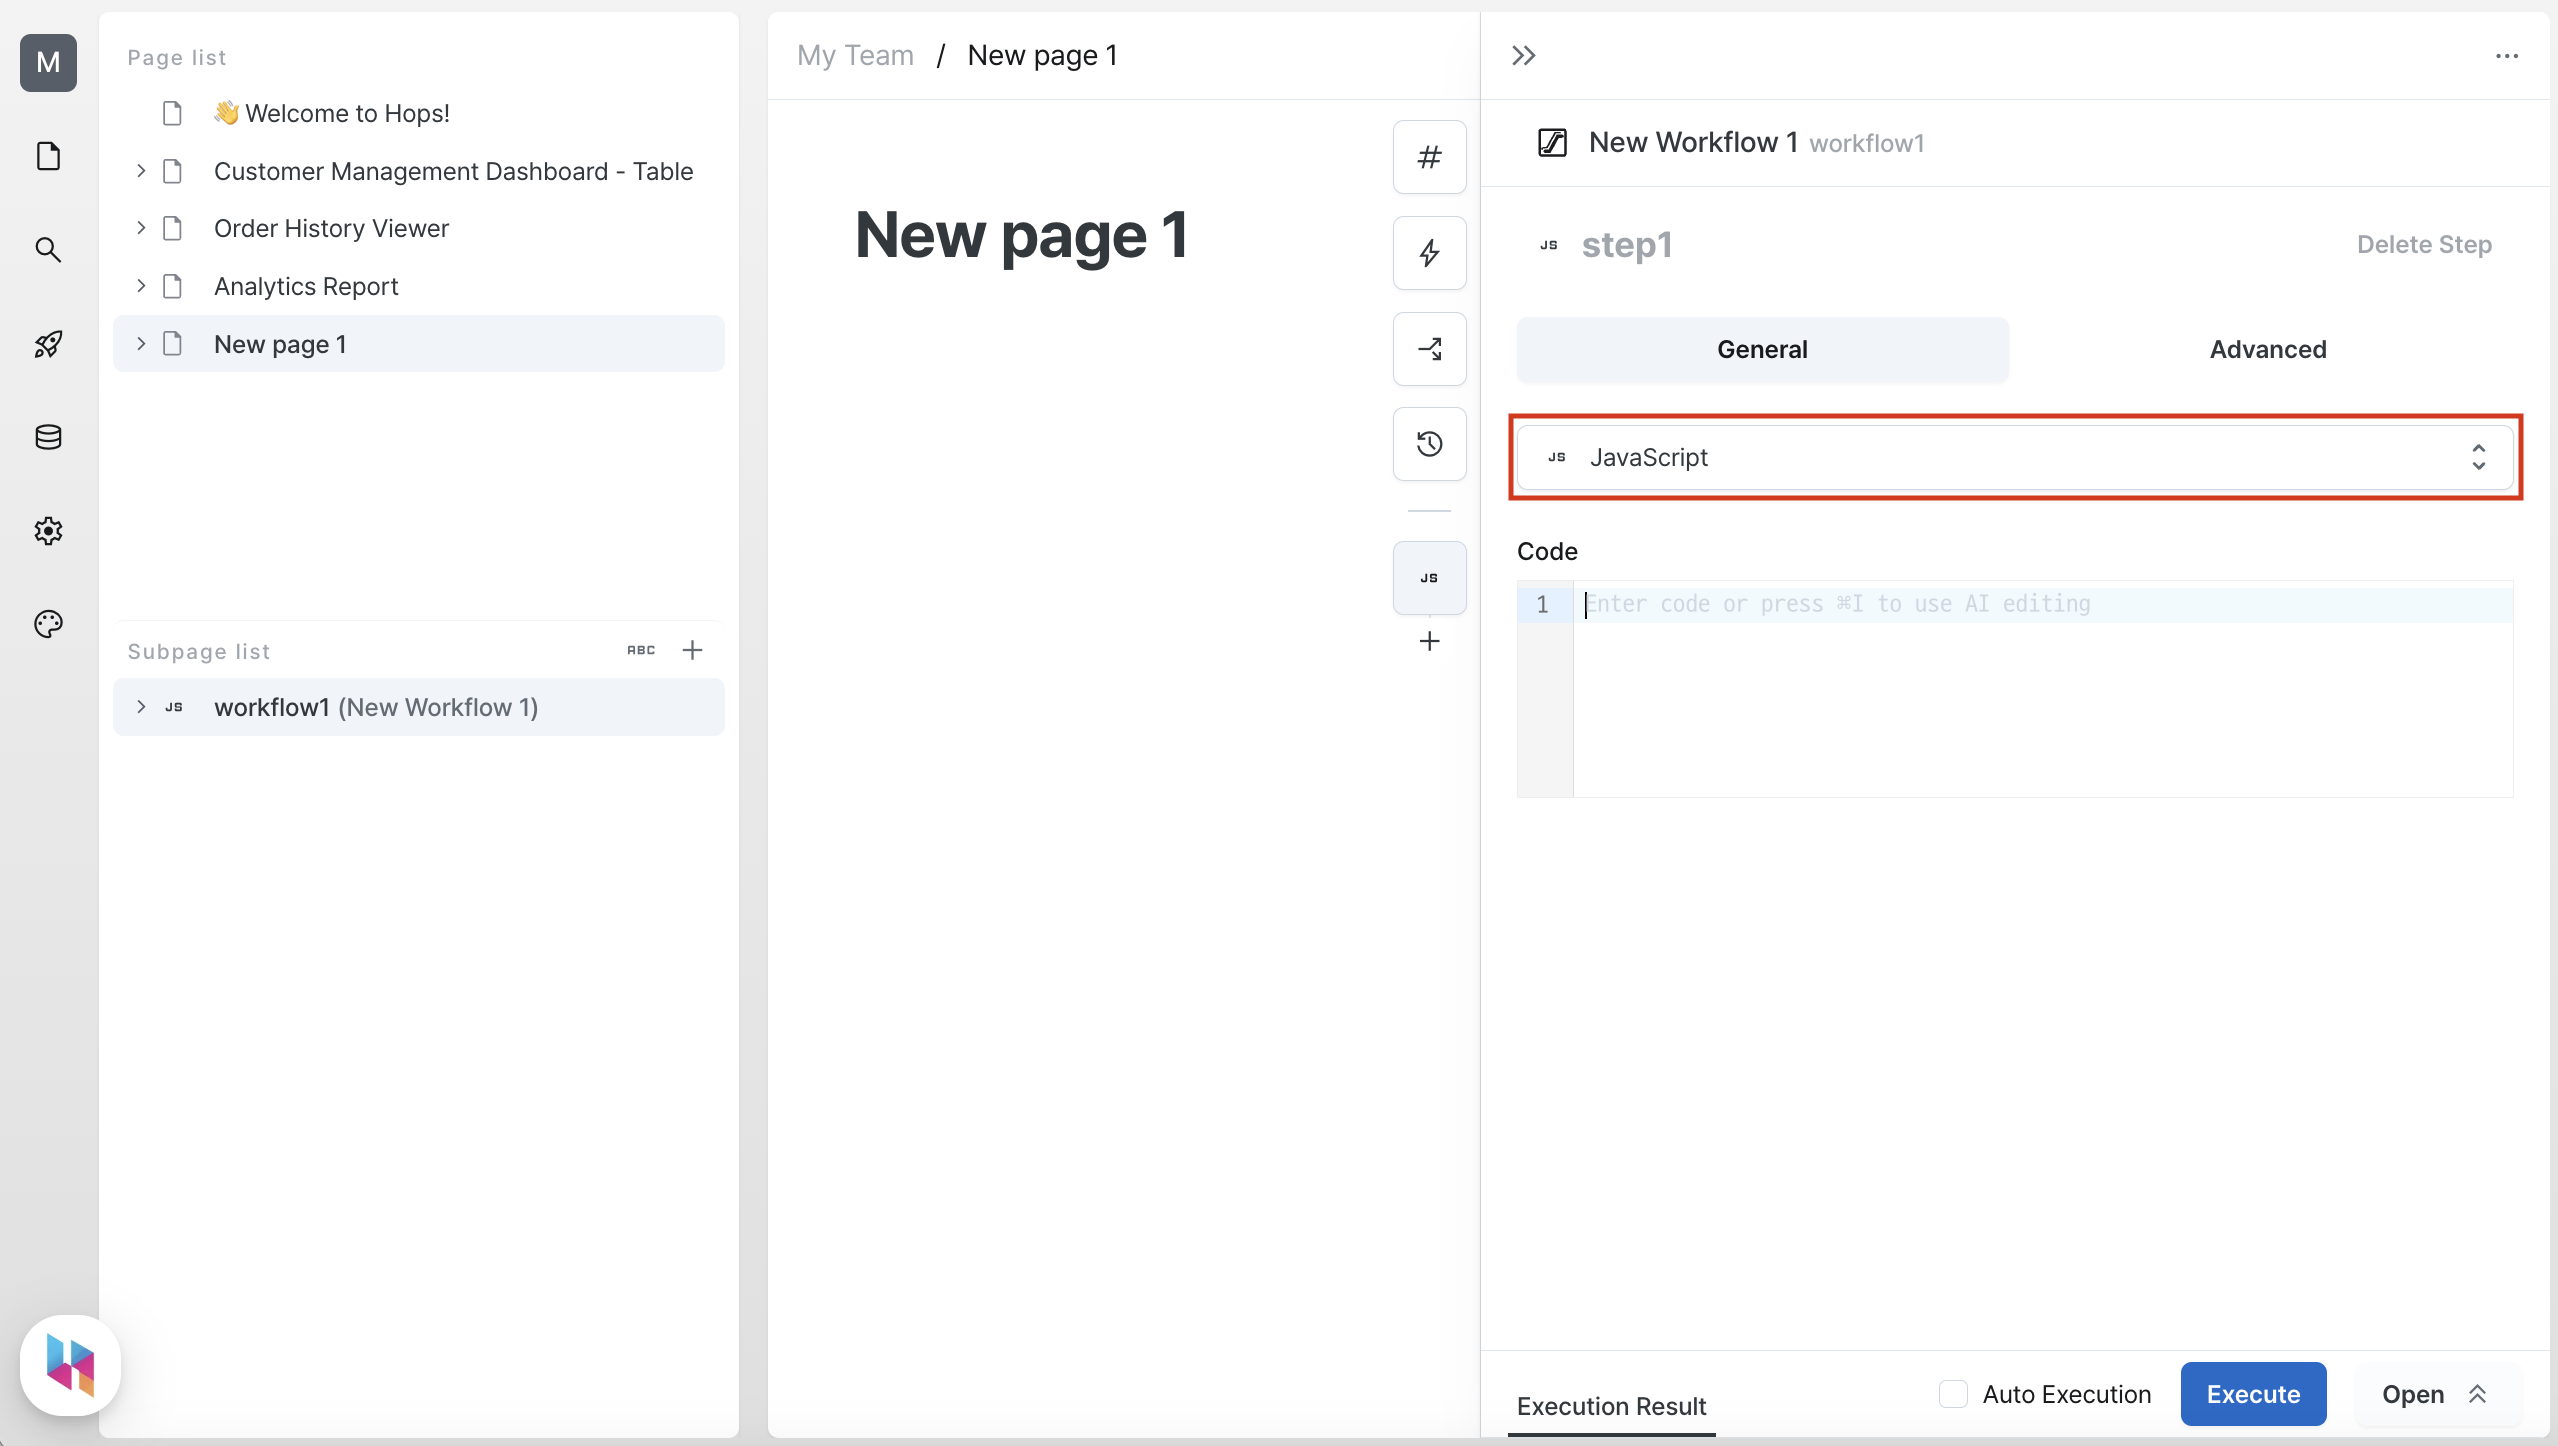
Need the sample database shown here? Contact us at contact@hopsoffice.com! For connection instructions, please refer to the Data Source Guide.
SELECT * FROM mock_0916_customers;
Creating Components
Now that the workflow is ready, let's create components to display the results. Since we have customer data from the database, let's display it in a table.
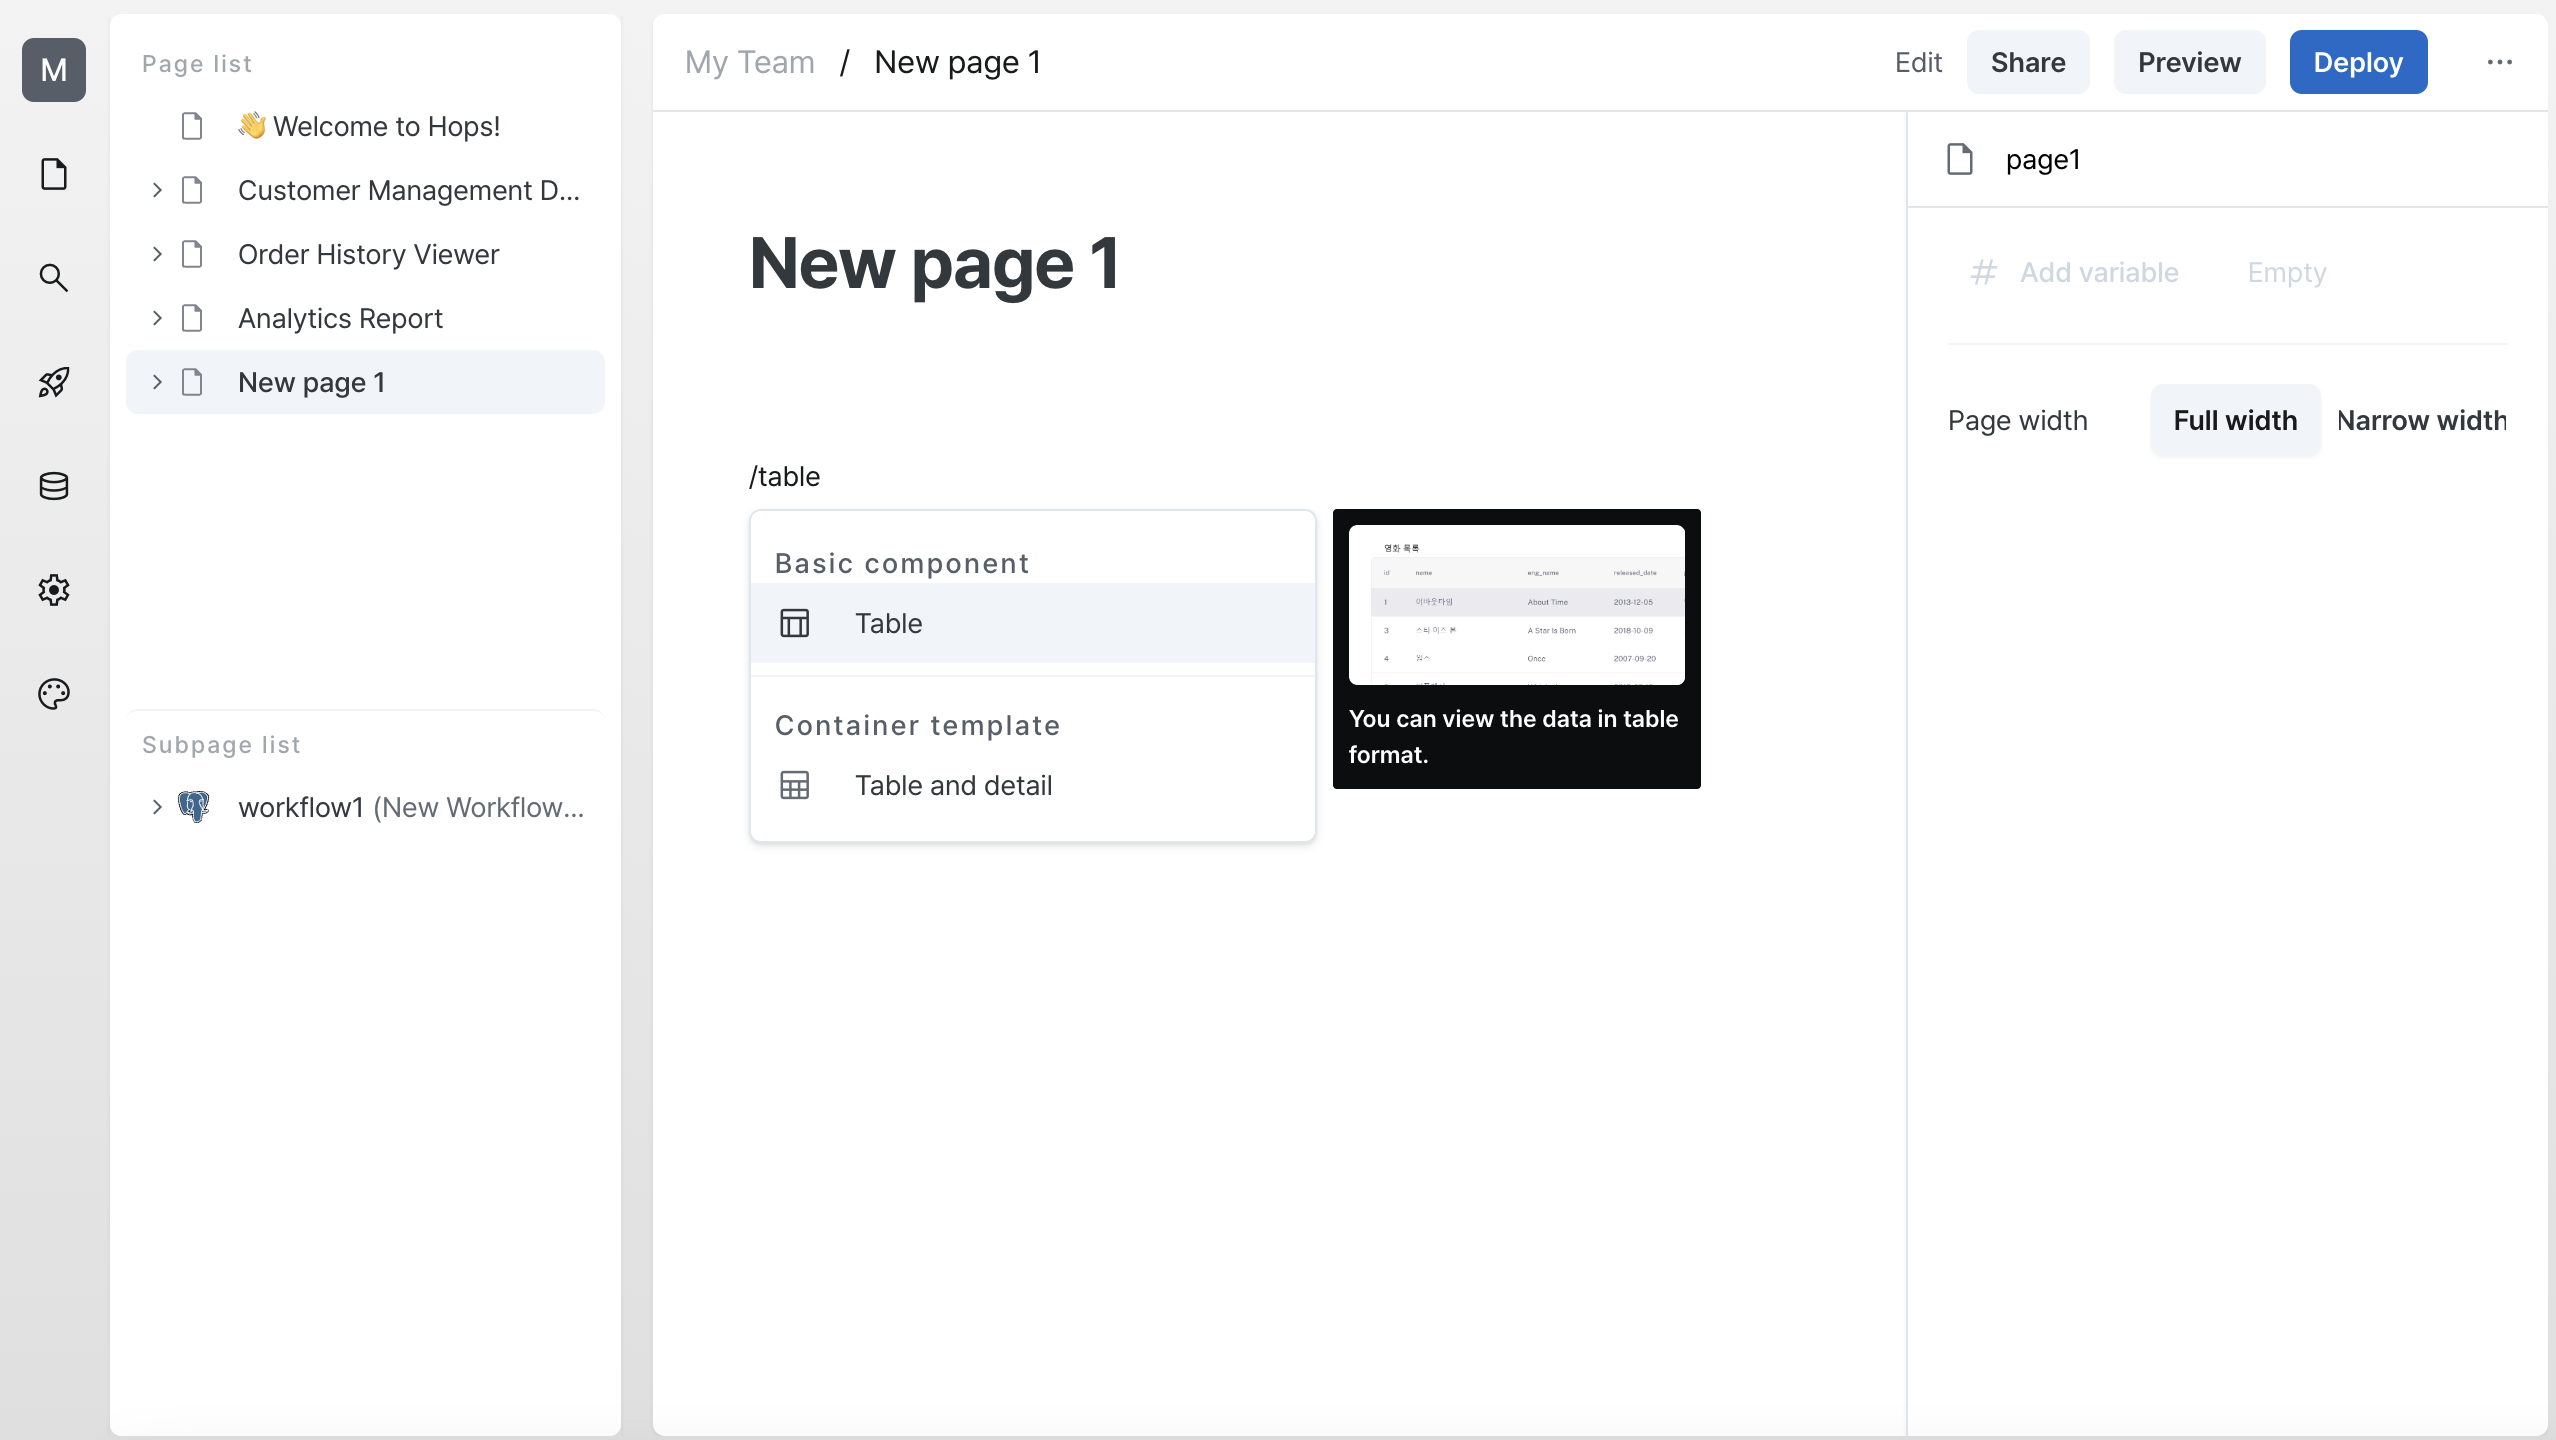
Click on an empty area of the page and enter commands like /table and press Enter.
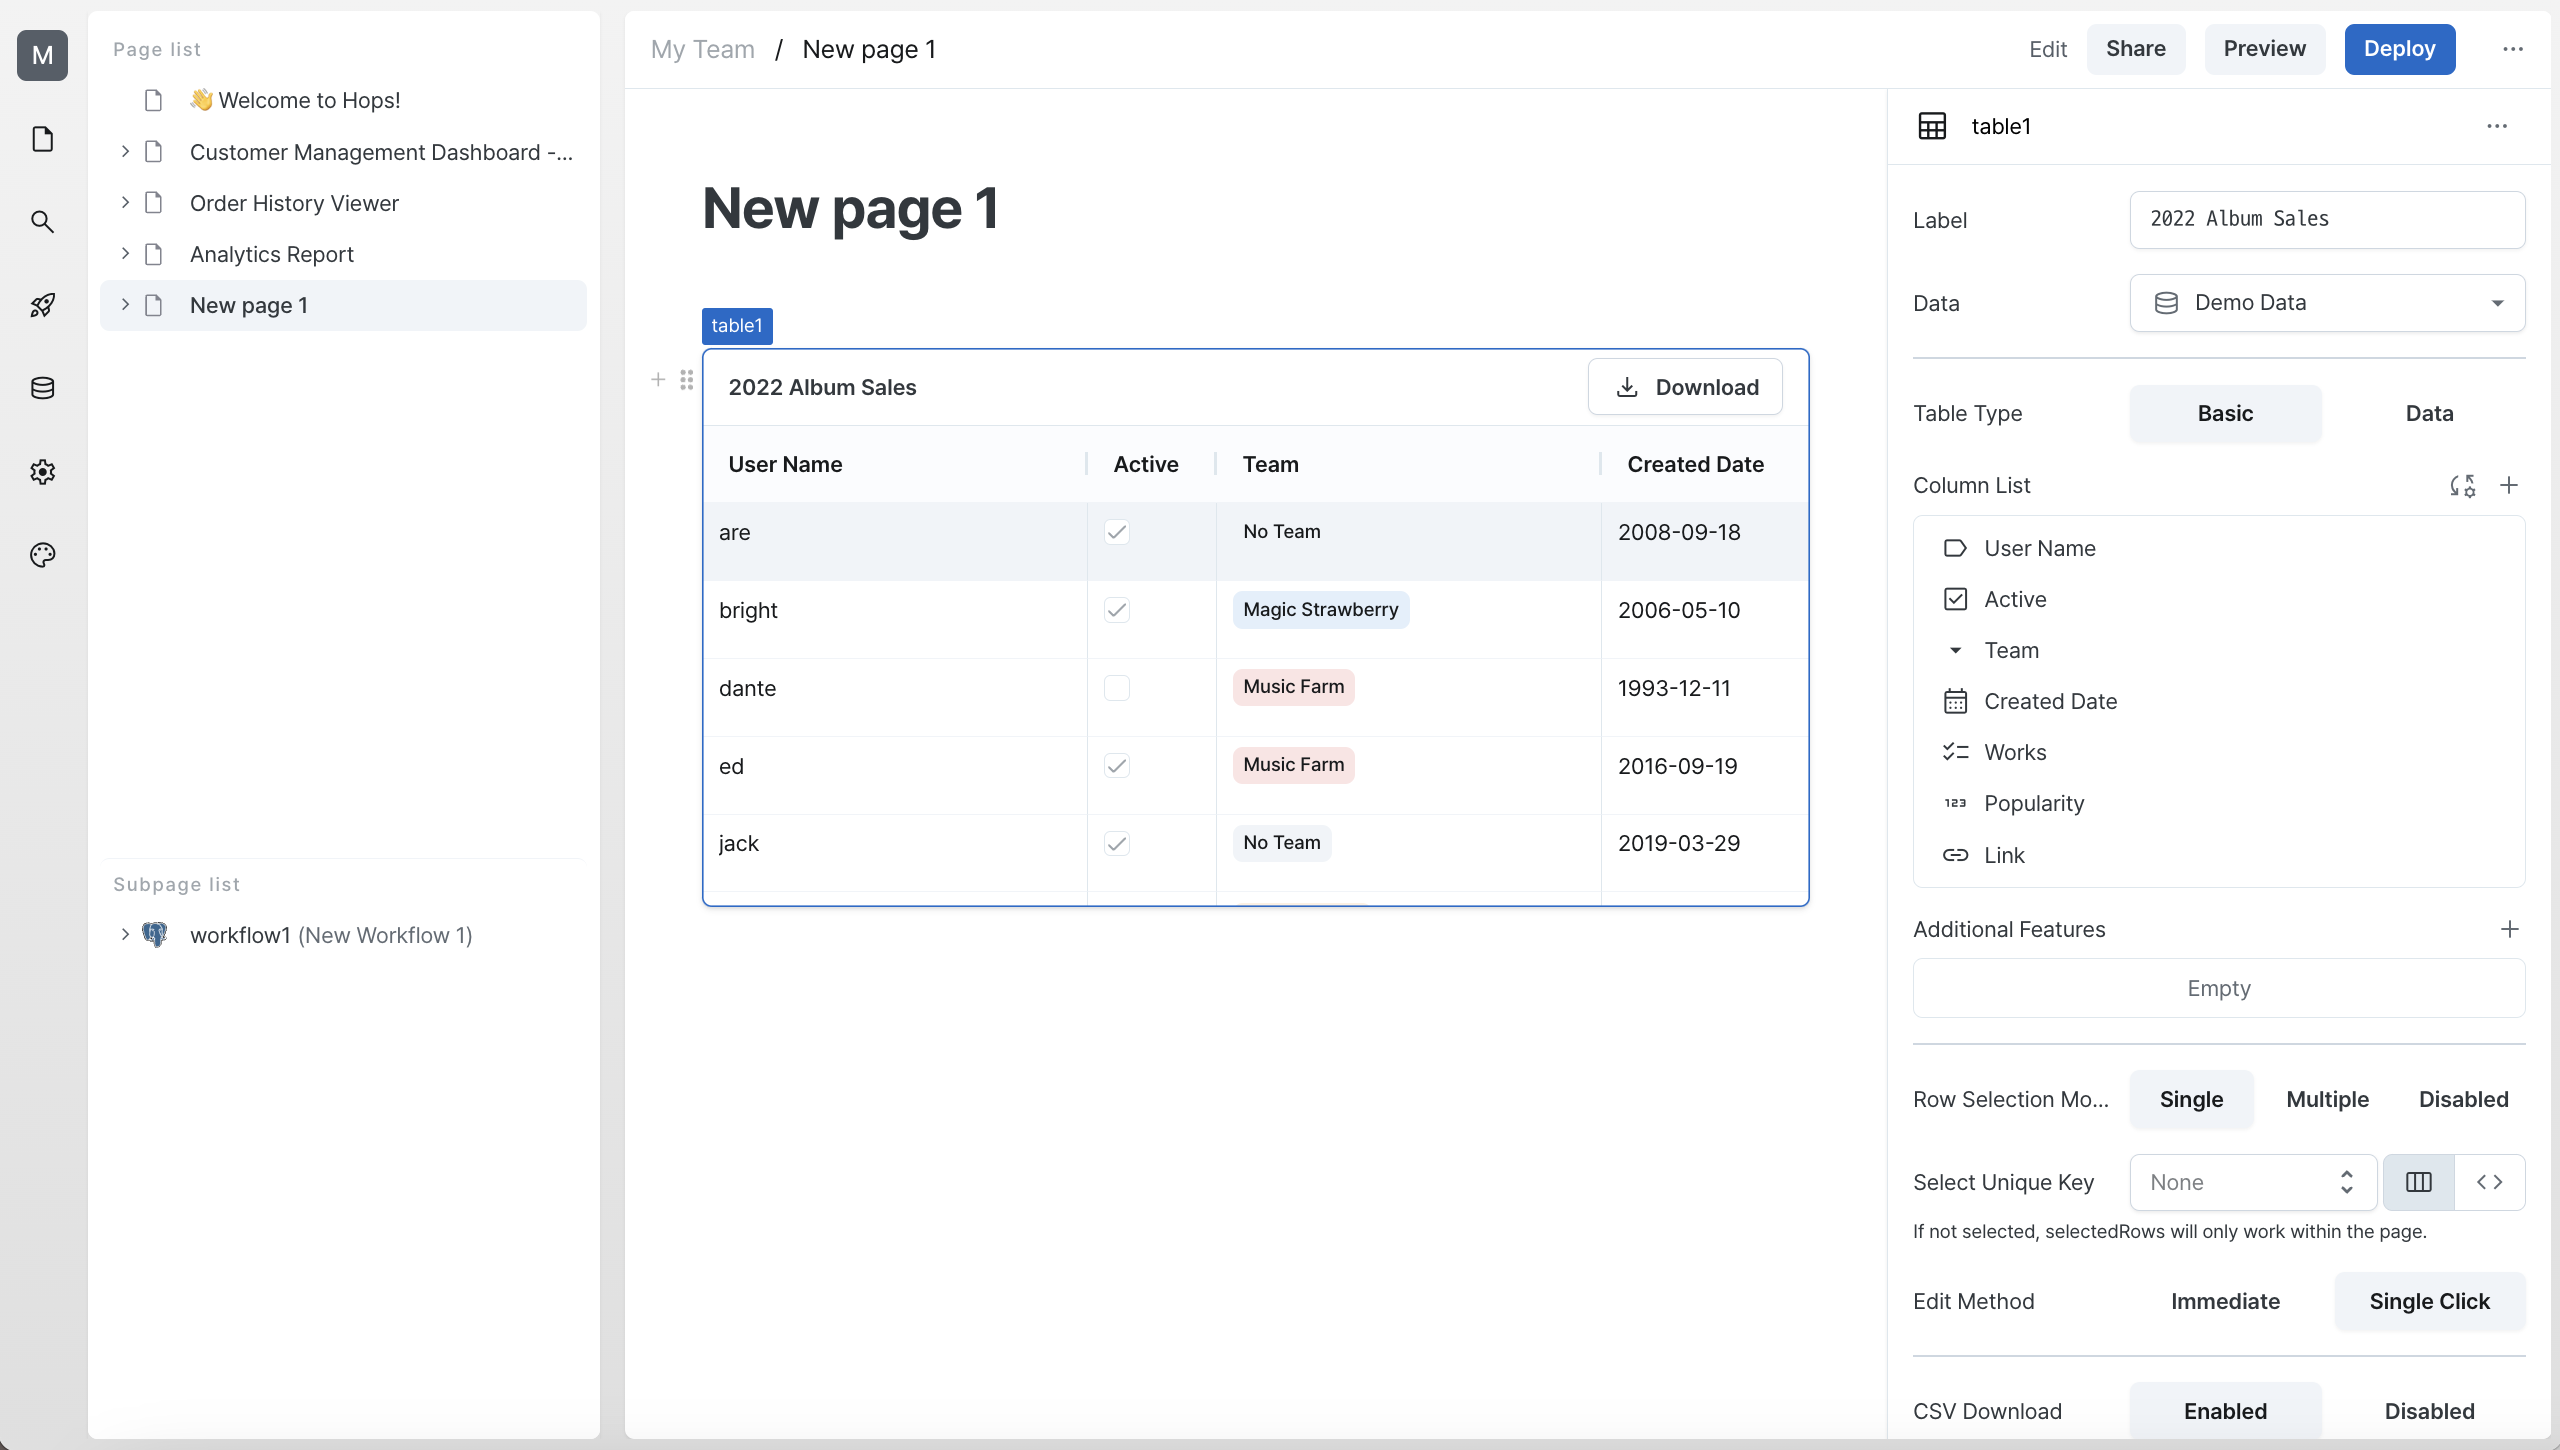
The table is added and properties panel opens where you can configure table settings. Let's connect the workflow results data to the component.
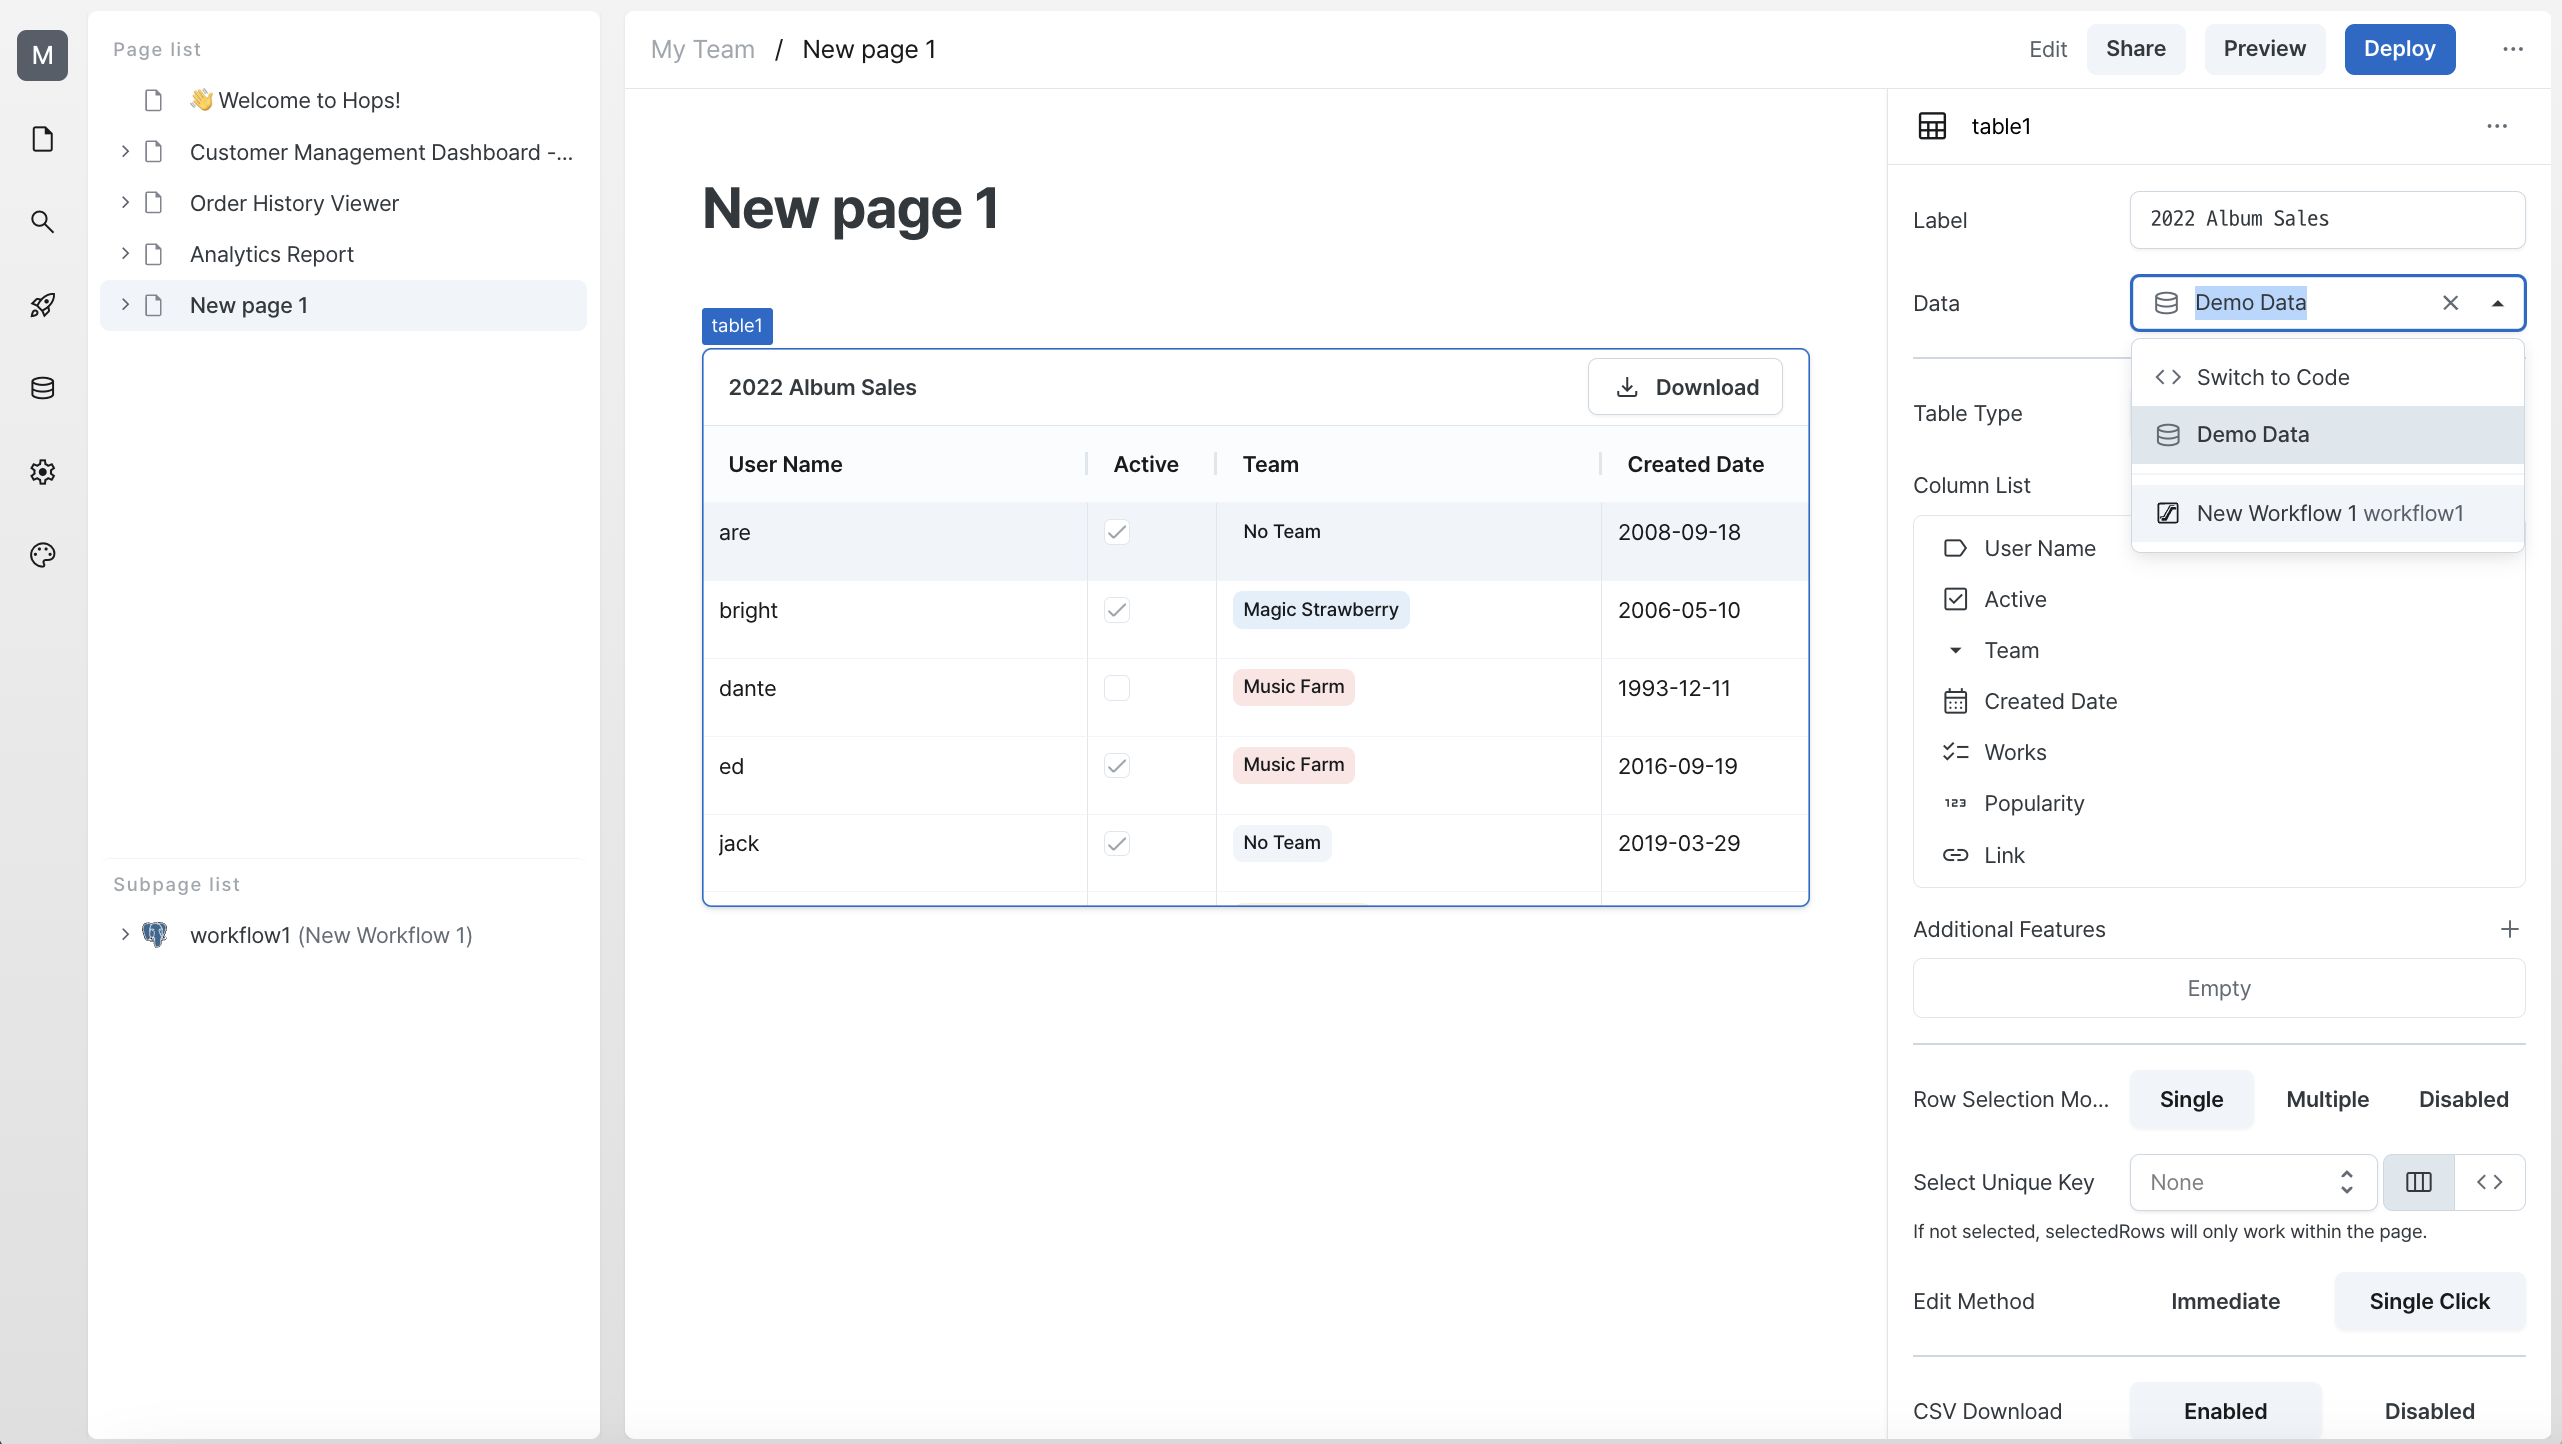
You can connect workflows by selecting an executed workflow using a select component.
You can also access workflow data using the workflow name. Since our workflow is named workflow1, we can get the data using workflow1.data. The database returns data of type { data: Record<string, unknown>[] }, so alternatively, you can enter workflow1.data.data in the code section. This approach allows you to see available values through autocomplete as shown below.
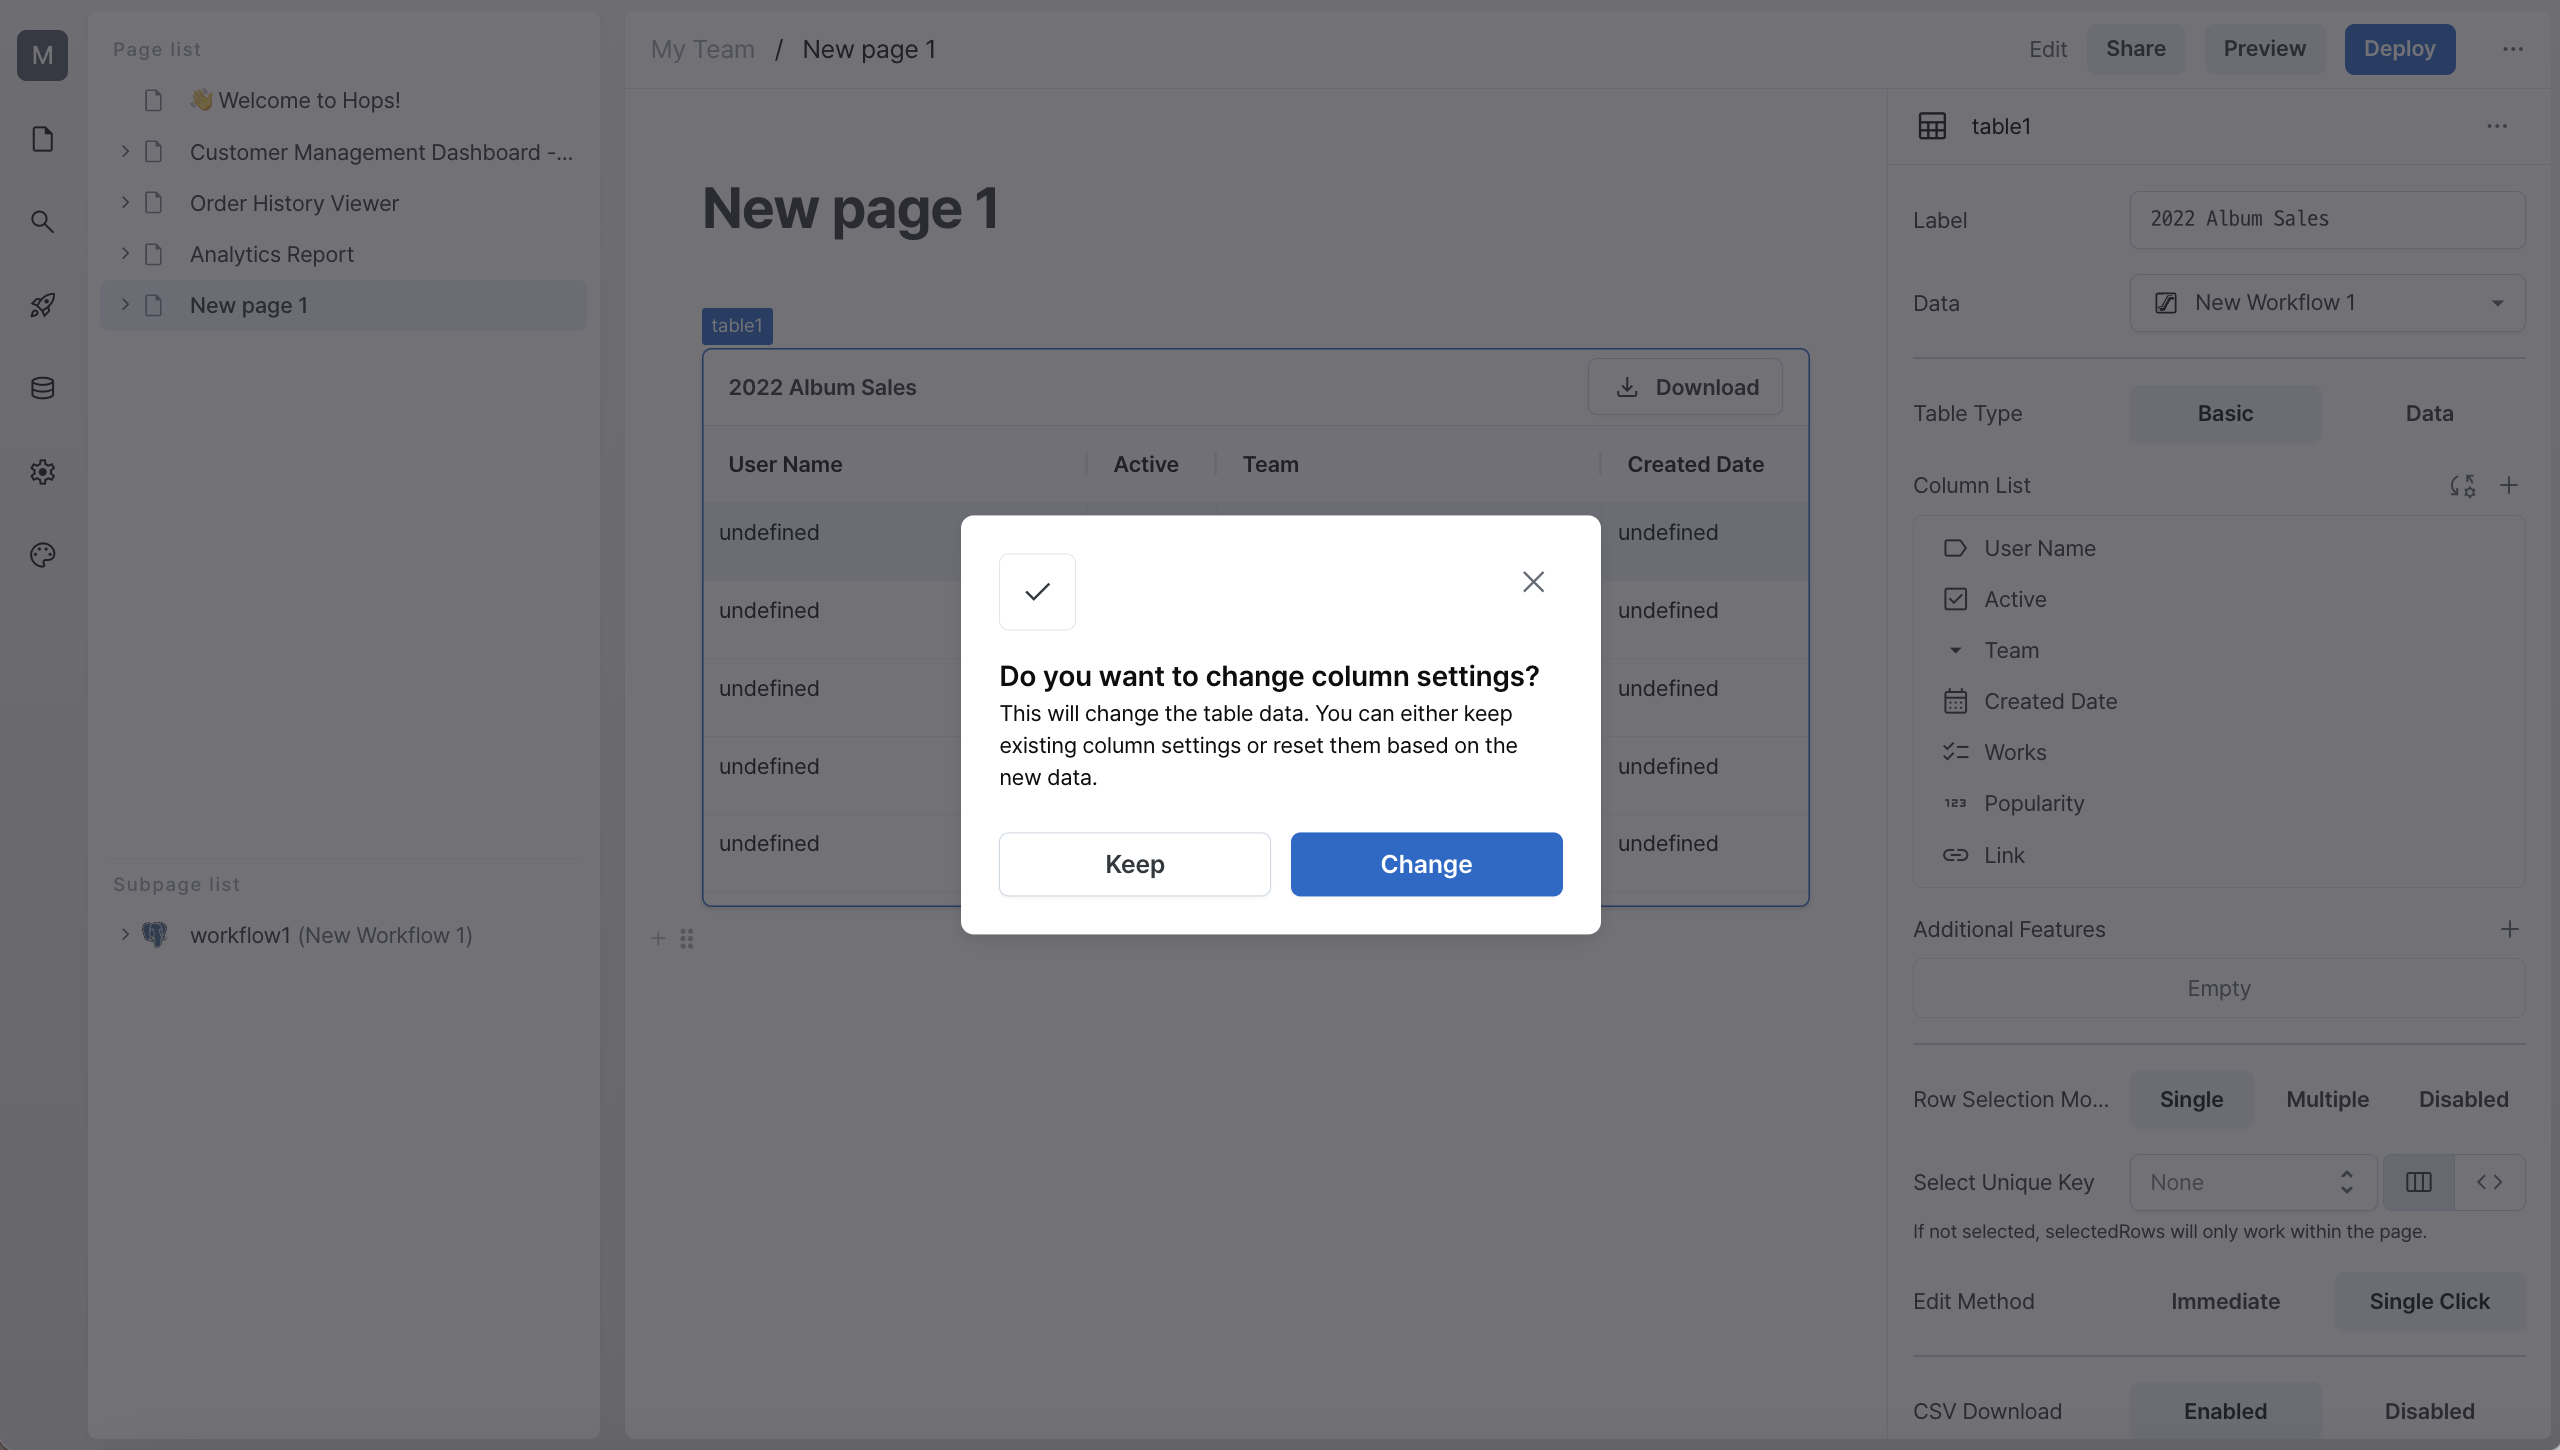
After entering the data, a modal will appear asking "Do you want to change column settings?". You can click either "Keep" to maintain current settings or "Change" to update the columns according to the new data.
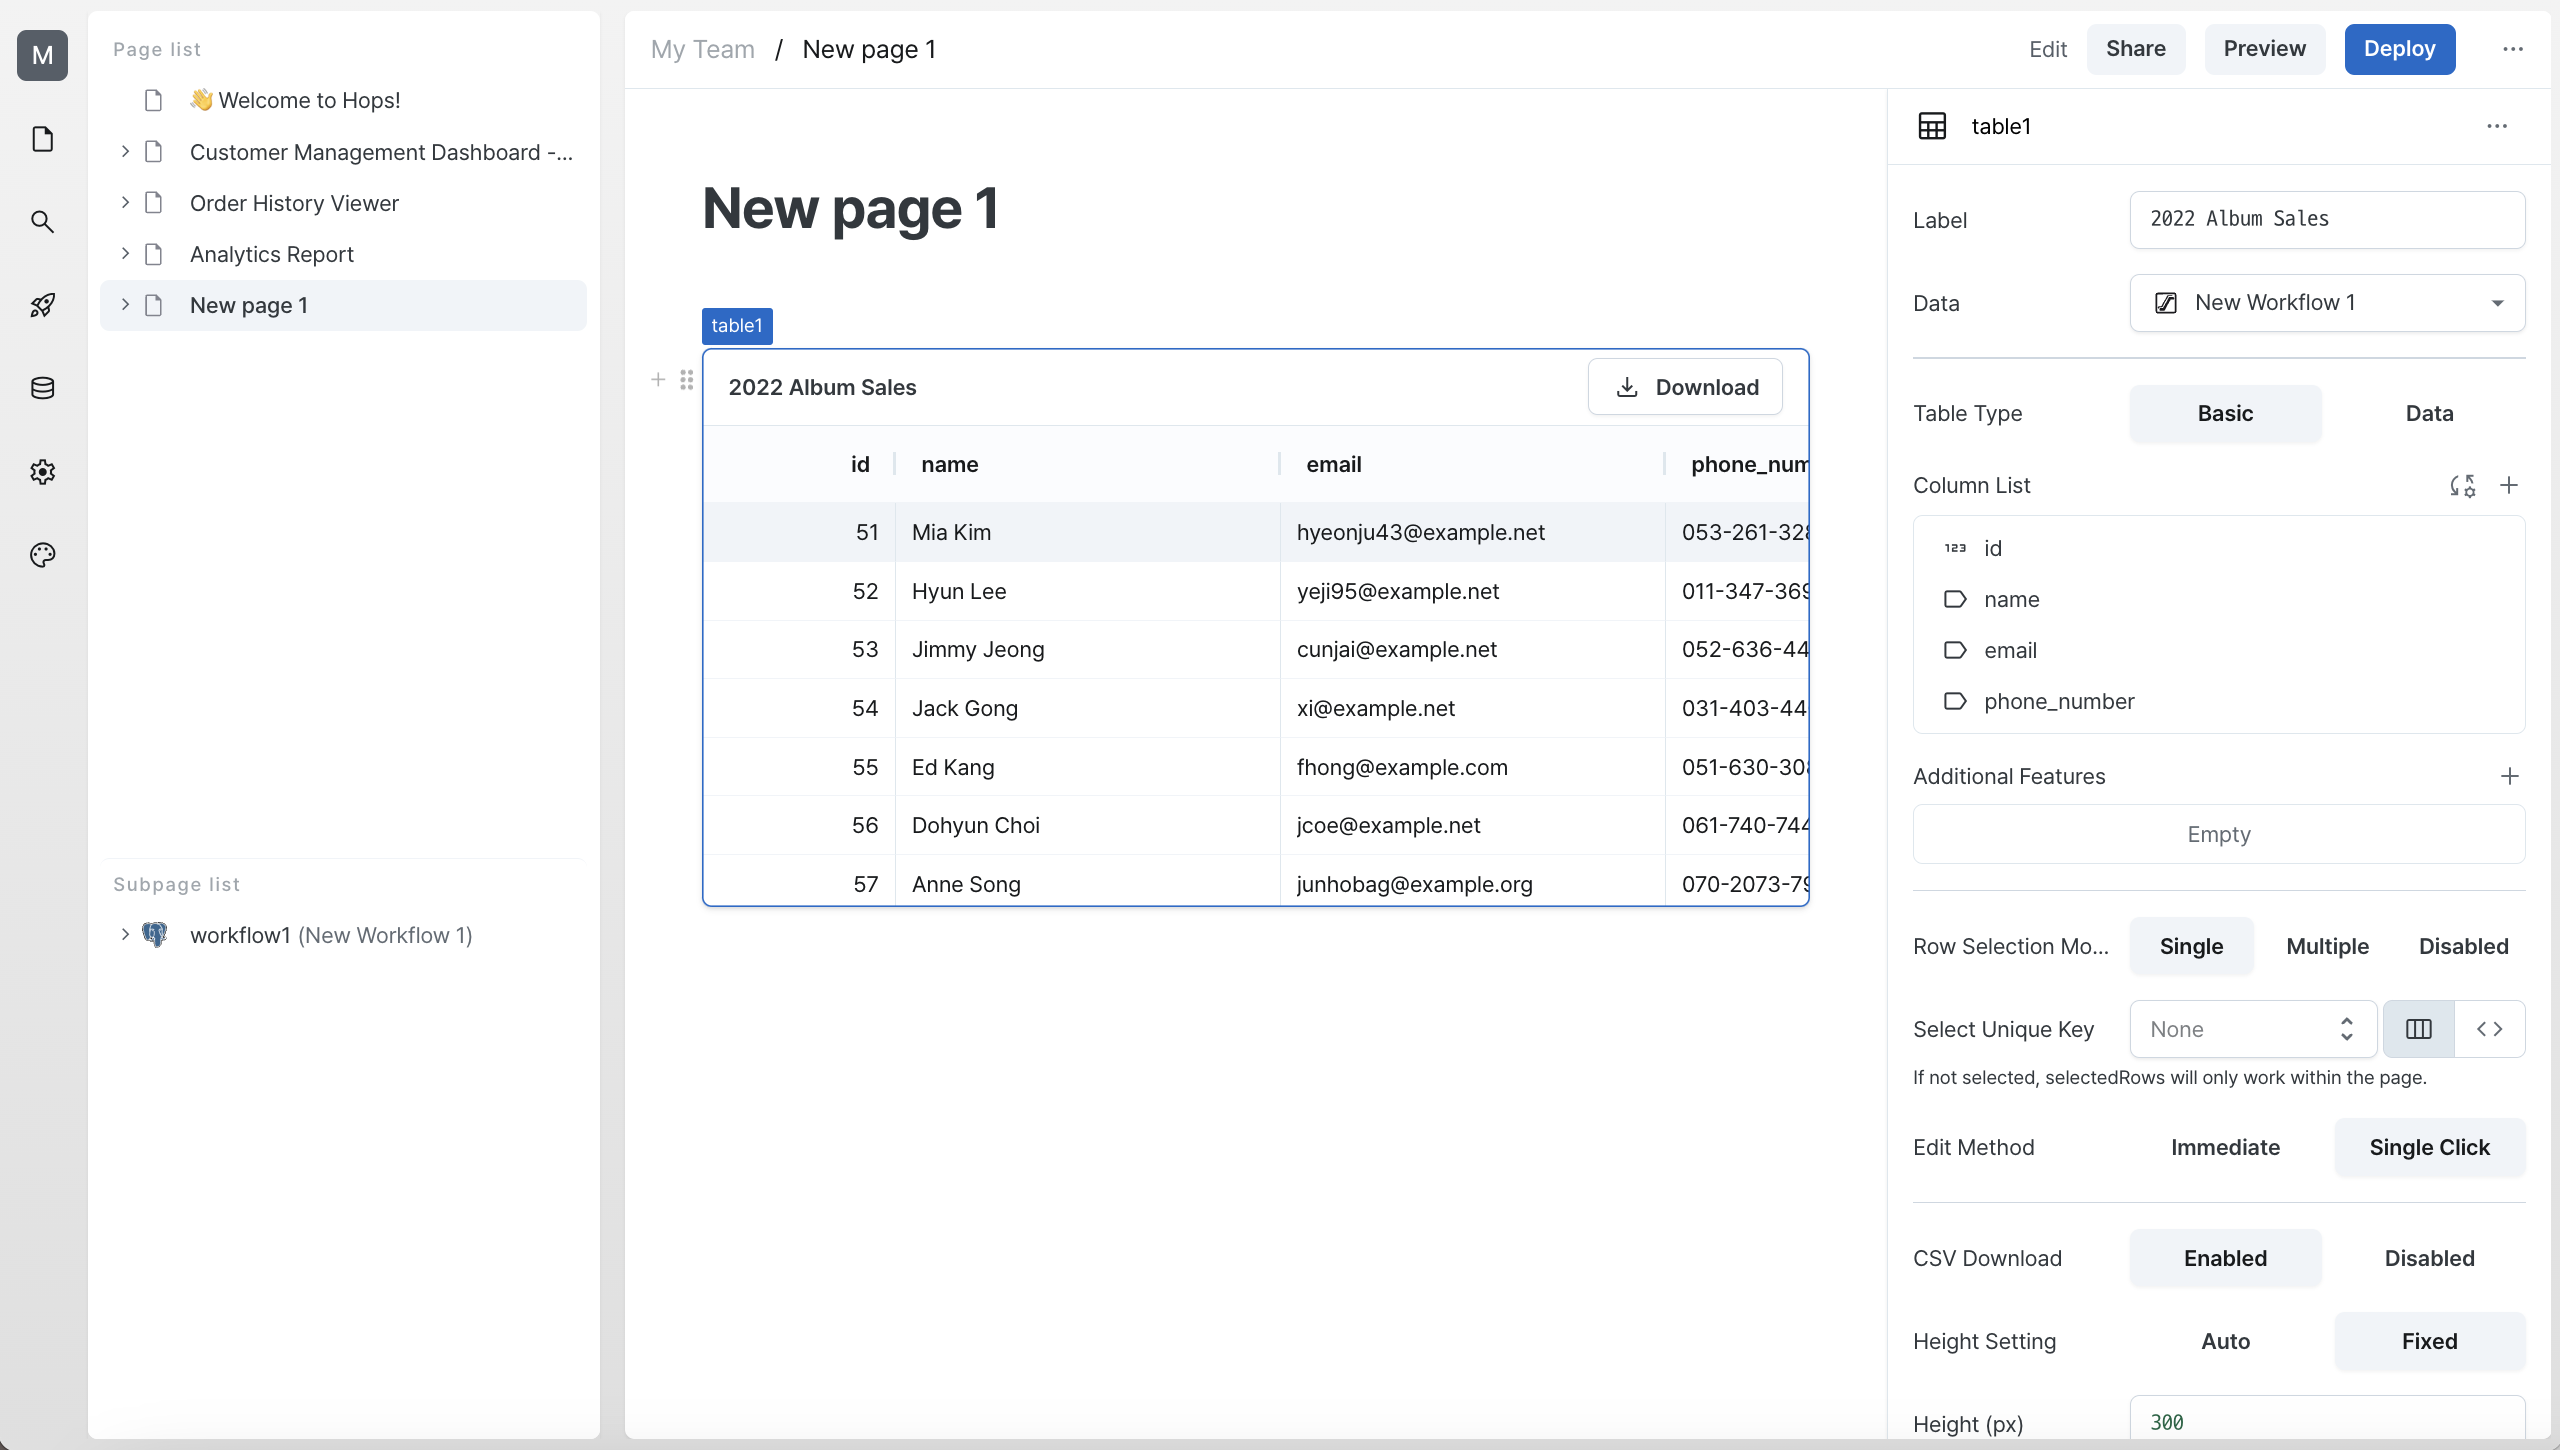
After confirming the column reset, the table columns will be reconfigured based on the result values and all data will be visible. Now it's time to deploy this page so all team members can see it.
Deploying
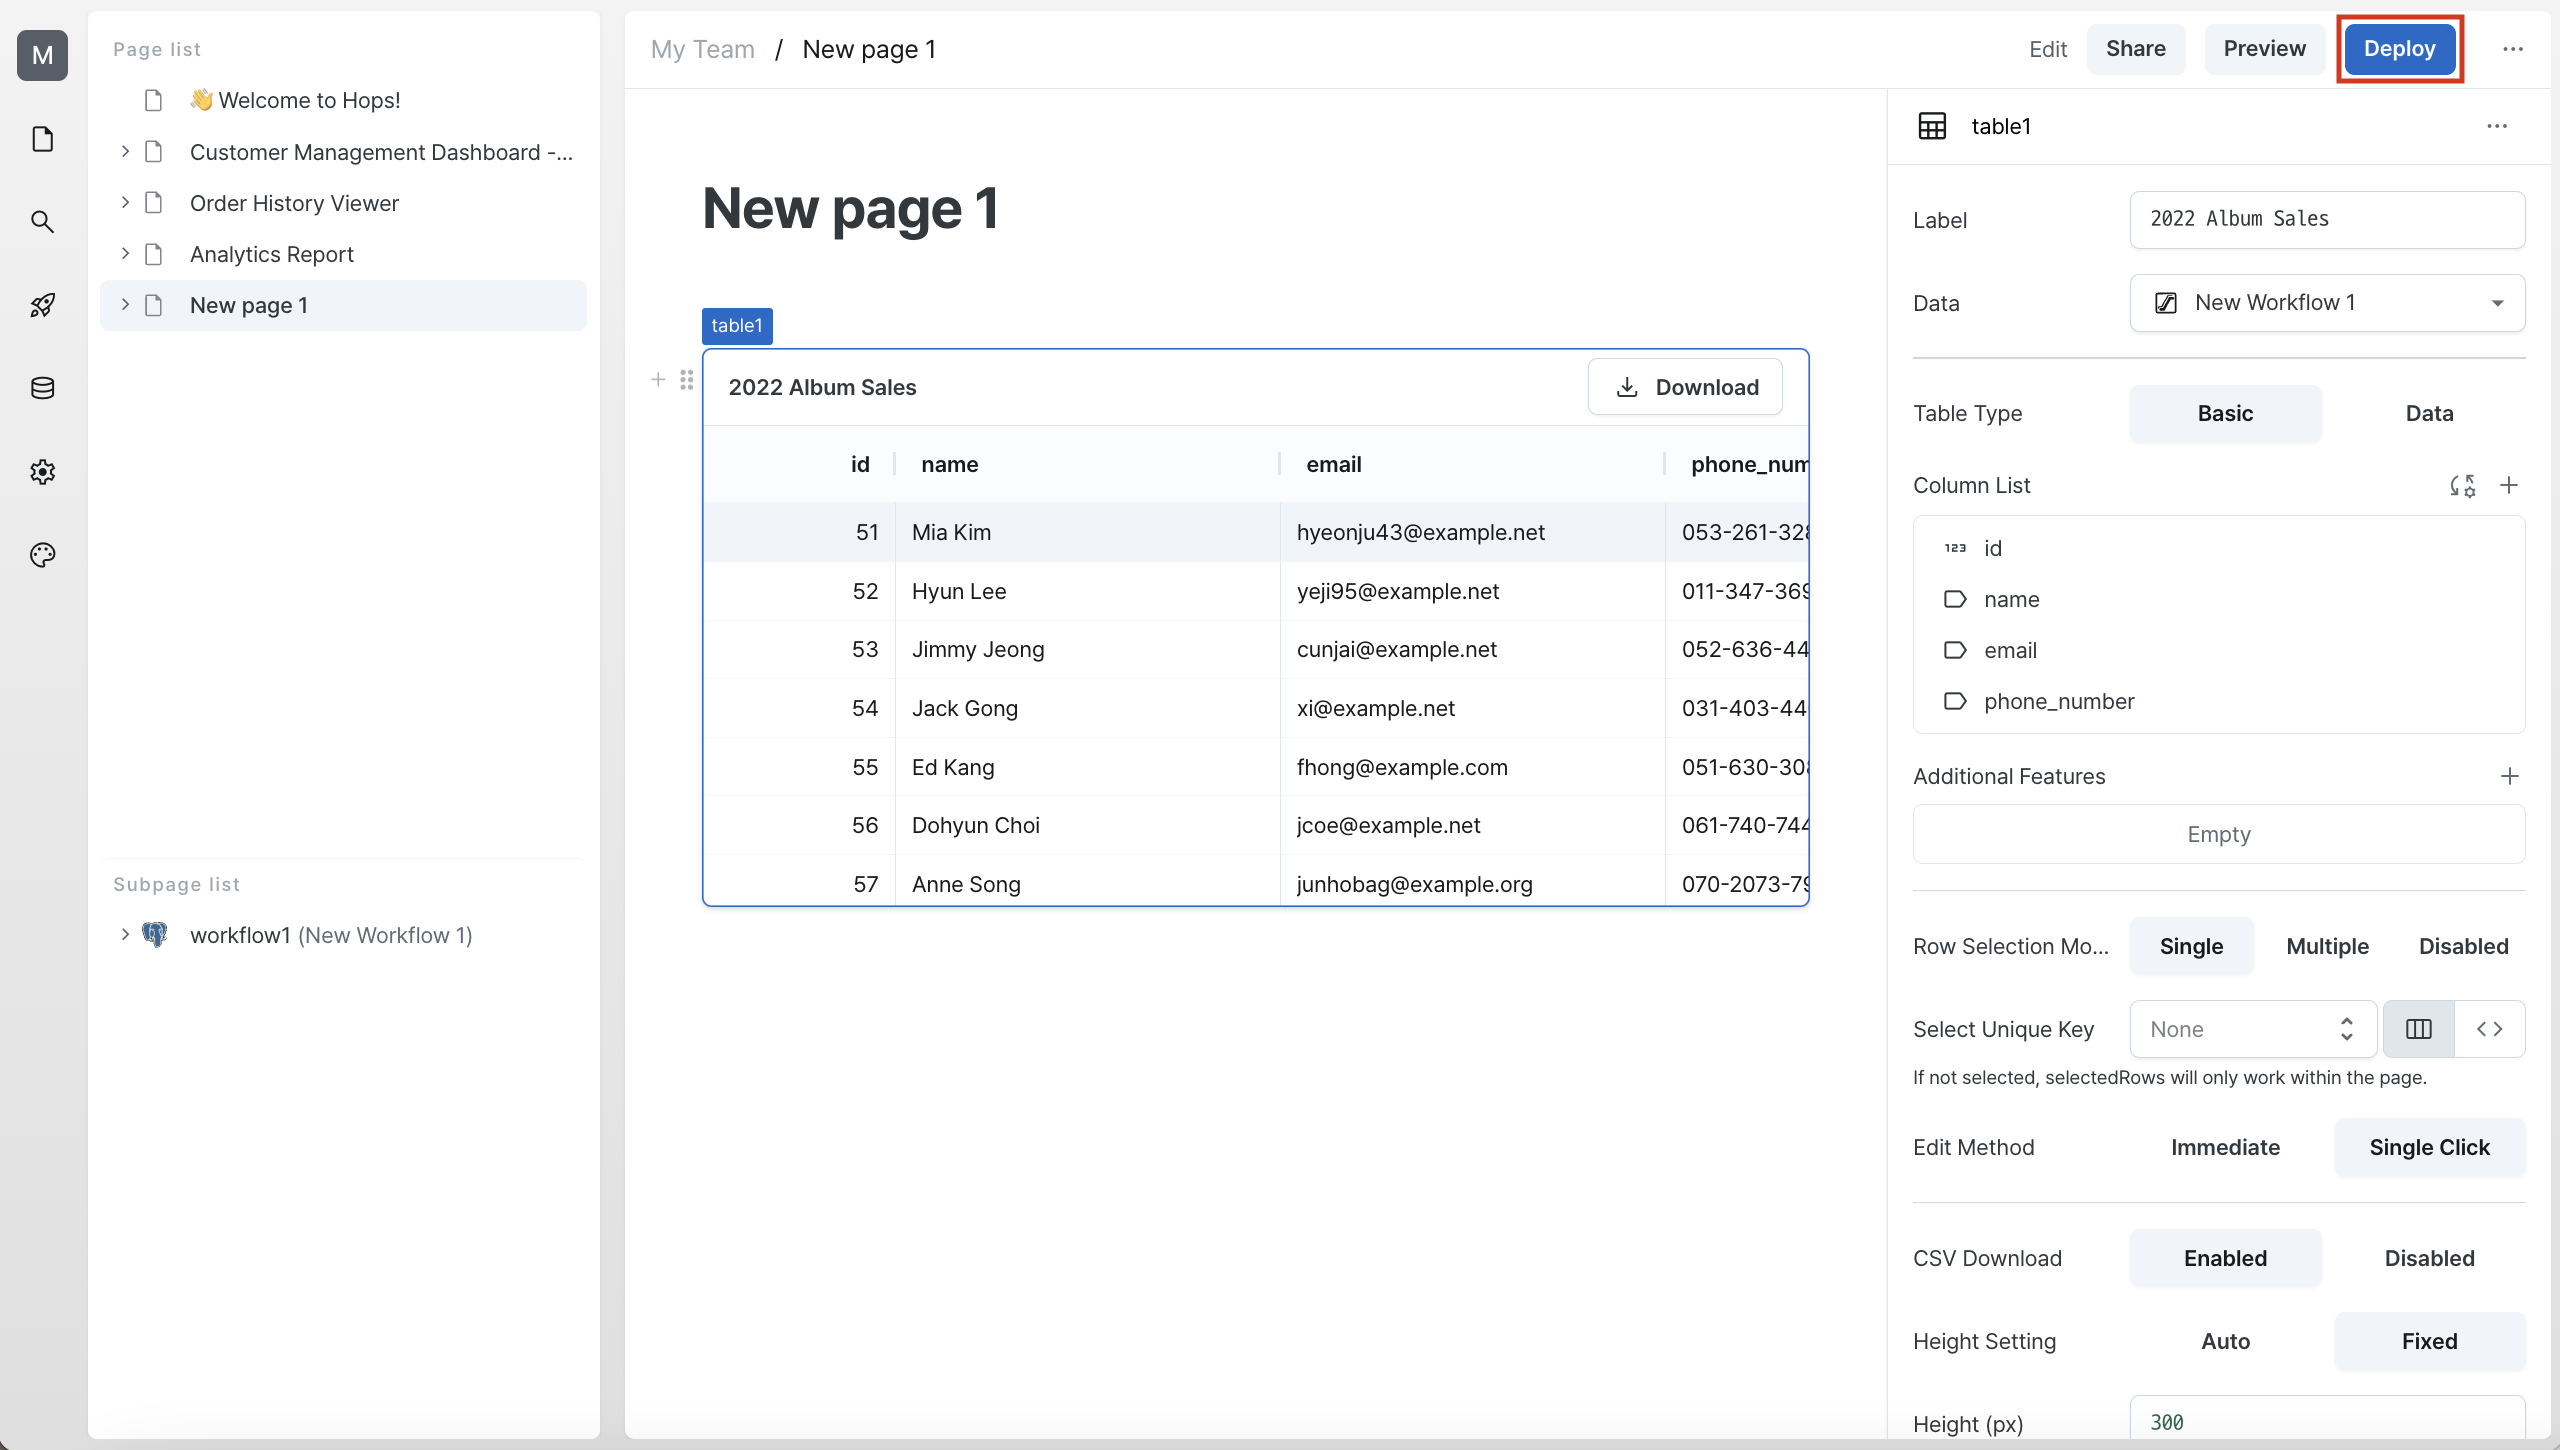
On the edit page, you can deploy at any time using the Deploy button in the top right. When deployed, non-admin members can also view and use the page. Whenever you complete a page, simply click Deploy to proceed with deployment.
Learn More
We've shown you how to connect data to a table using PostgreSQL database. Through more upcoming tutorials, we'll demonstrate how quickly and easily you can develop admin and back-office systems with Hops.